Hello everyone!
I am trying to use the VR 360 Camera in “Camera Object (Uvs)” mode.
what I want to achieve:
I am using notch as a rendering tool (not realtime).
I am mapping a simple room ( a large rectangle without ceiling ).
what I thought it could do:
Using the 360 Camera would allow me to render everything at once, to the correct UV, without doing my own 5 camera setup.
I thought that it would basically do a cubemap render target and reproject it onto the object’s UV.
it doesn’t seem to work like that and there are no explanation on how to use this feature,
Am I misaken?, does this feature made for this purpose?
Can anyone tell me how to use this projection mode properly?
thanks!
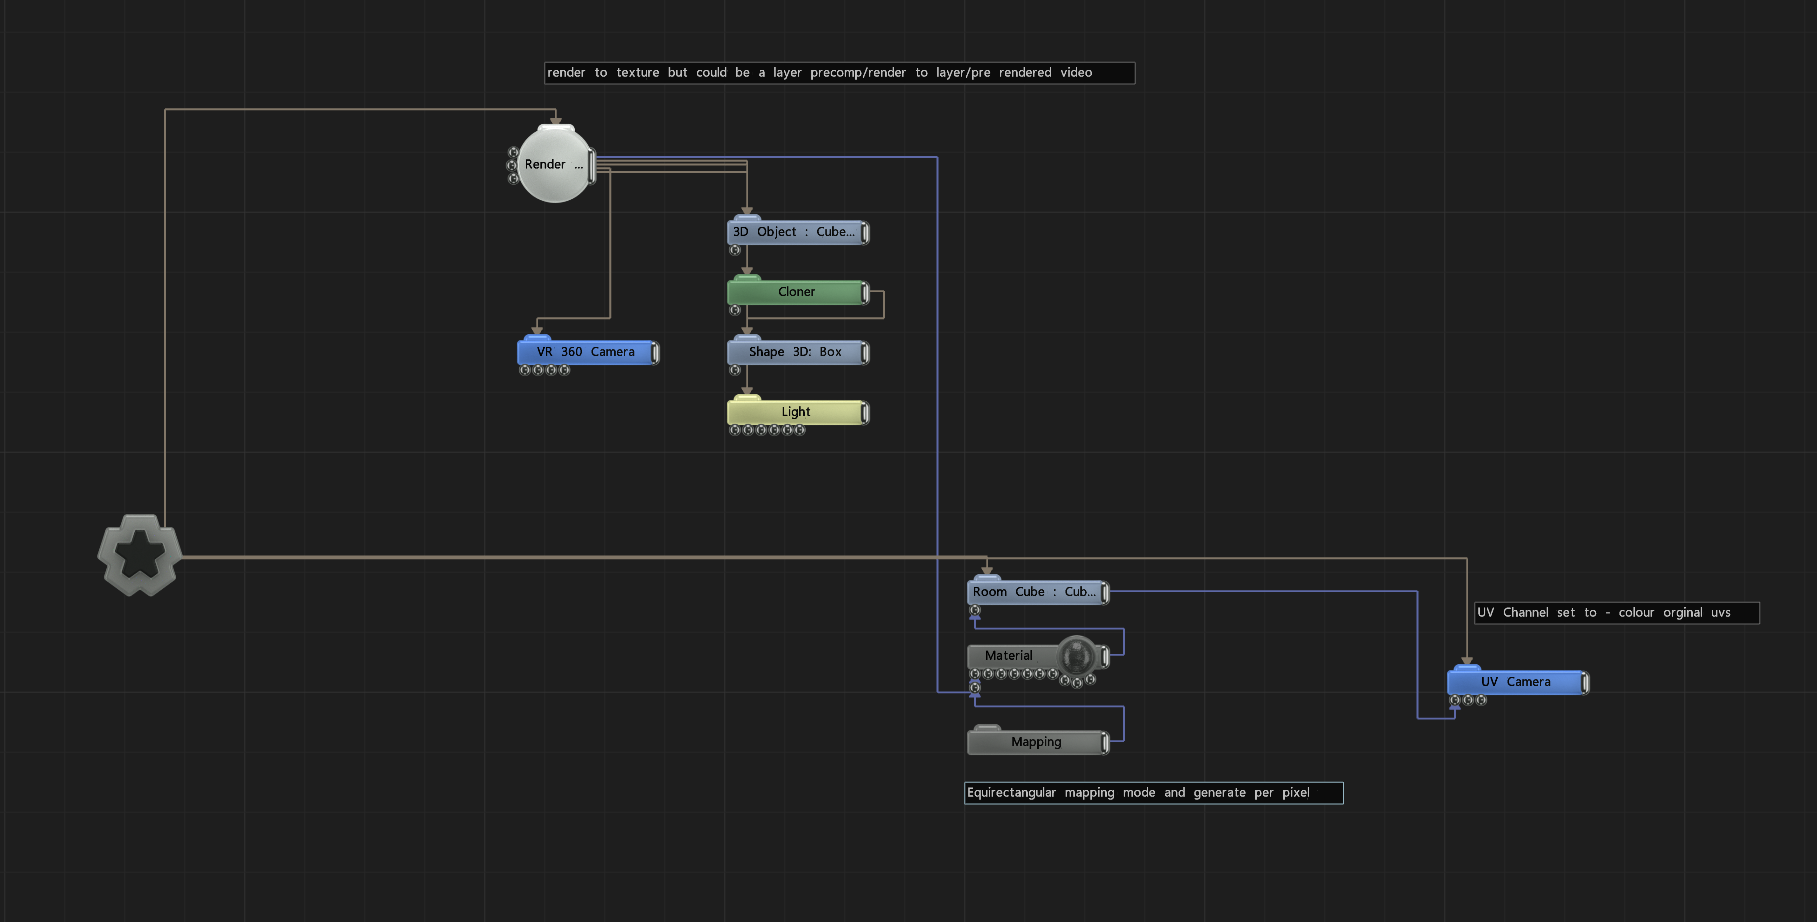
Try using the mapping node with Equirectangular selected on the mapping type. You need to match the global position of the mapping node and VR Camera, which also allows some camera movement in the scene.
The biggest downfall is that way the Equirrectaguale mapping works, you end up with fewer pixels in some areas. I increased the resolution until my GPU gave up to help with that but it was still not ideal. Certainly fun to gain perspective on the content in a 360 room. I think you’ll need the UV camera set to Colour - original UV also.
Hey Charlie, I’m currently trying to do the exact same thing and was wondering if @tomp suggestion worked for you. In my case, I have a 4 wall room with no ceiling or floor, and I’m trying to create a comp with UV texture. Ultimately, all of my scenes will be exported to Blocks and sequenced in Touch Designer but the concept is the same.
Thomas, is there any way that you’d have a moment to take a screenshot of the node setup you’re describing? Mapping node goes into the material of a 3D room model to recreate the surface UV’s?
Hi Anthony,
I ran into the exact same limitations that Thomas presented.
even if I could render everything at once, I would be out of Vram rapidly.
in the end, I am rendering multiples cameras and stitching them back to my UV layout once in comp.
I just tried what Thomas said today… unfortunately I did not get it to work.
if you only have 4 walls, maybe a 4 camera setup would be fine ?
Ah ok ok. I couldn’t quite get the mapping to work properly but my current tests are with a single UV camera and I thought it was working but for some reason it’s not seamless… can’t seem to get the right combination of mapping modes and camera settings configured.
Out of curiosity, how does the multiple camera setup work? What kinds of camera nodes are you using and how do you get it all to stitch seamlessly?
The tricky thing for me is that my content will ultimately be really precise line work and graphic design elements that need to align perfectly when they wrap around. I’ve thought about cheating and just creating content straight to my 9752x1200 pixel map resolution but then I’ll be pretty limited in the direction that the content travels in, motion wise, since there would always be an “edge”.
For me trying the setup with UV camera, I can see the UV but it is only getting filled with flat colors… so something it not working properly…
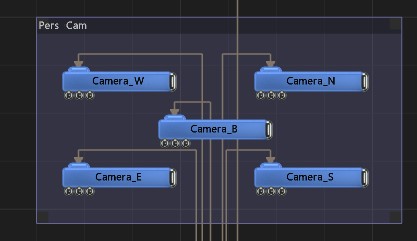
The camera setup I’m using is quite simple, I have all the regular camera nodes centered and positioned at eye level. then I have adjusted the camera ratio to the wall ratio and played with the zoom until the edges are on the border of the frame.
and that’s pretty much it.
it looks like this on my graph
This is great, thanks Charlie and the simplicity might actually work in my case. I feel like I’ll need to play with orthographic on the cameras.
Do you have a setup for mapping the renders back onto a room for previz? It’s been taking me unnecessarily long to set up a simple 4-wall surface to re-project the content with Layer Pre-comps, to test ideas on I can never get the right combo of mapping/projection on meshes i’ve attempted to build using native Notch nodes OR in cinema 4d with UV mapping…
Hello Anthony!
I am usually testing all that in Compositing. but I suppose it it possible to either use render layers or the Multicamera camera., then in another layer do a crop and replace it on your model.
you can simply send the multicamera to TD and do your cut there too
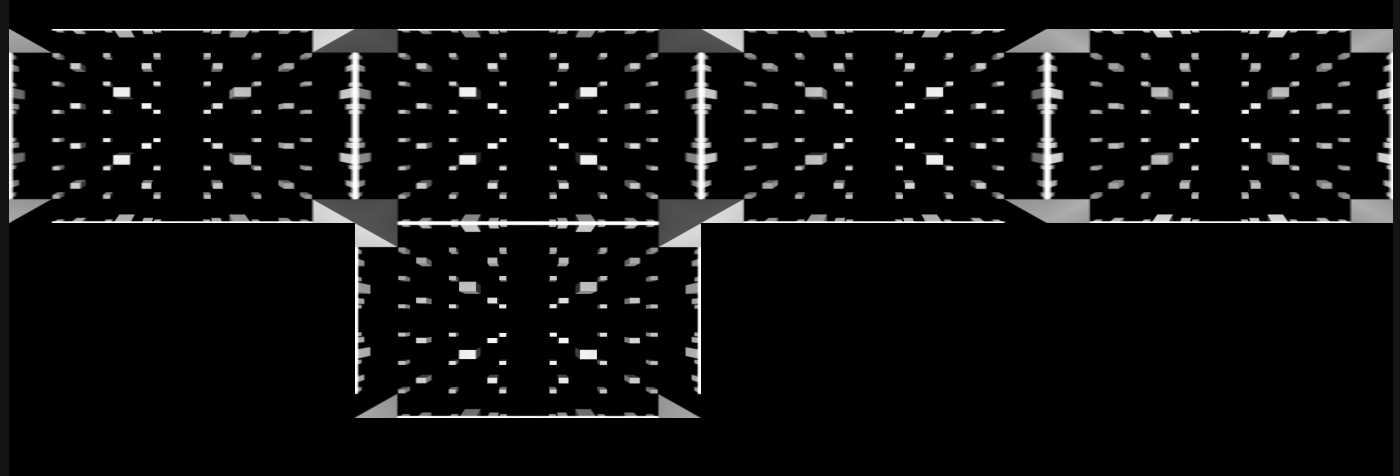
thats the UV camera output from the basic scene that’s set up. the lines are from the same cube that is being mapped using the visible lines in the 3D object node just to help show the UV layout.
Thanks Thomas!
Makes sens now, If I understand it properly it means that the content is first render as a cubemap then reprojected onto the uvlayout.
it is a nice solution but it also means that there might bit quite some stretched pixels.
side note, It is possible to have perspective camera and seamless though, cameras focals will be different for each walls (that have a different size).
The scene is rendered with a 360 cam, which creates an equirectangular image and then remapped onto the cube room which has a cube UV mapped laid out as the last image. which could then be mapped in the physical space hope that makes sense.
I might be wrong about the perspective, from testing with the perspective and depth it creates, it doesn’t. Do let me know if you’ve got this working…!