DFX file download
Adding creative visual effects to your videos should be fun and adventurous. Doing it live and in real-time makes it feel more like playing an instrument than designing.
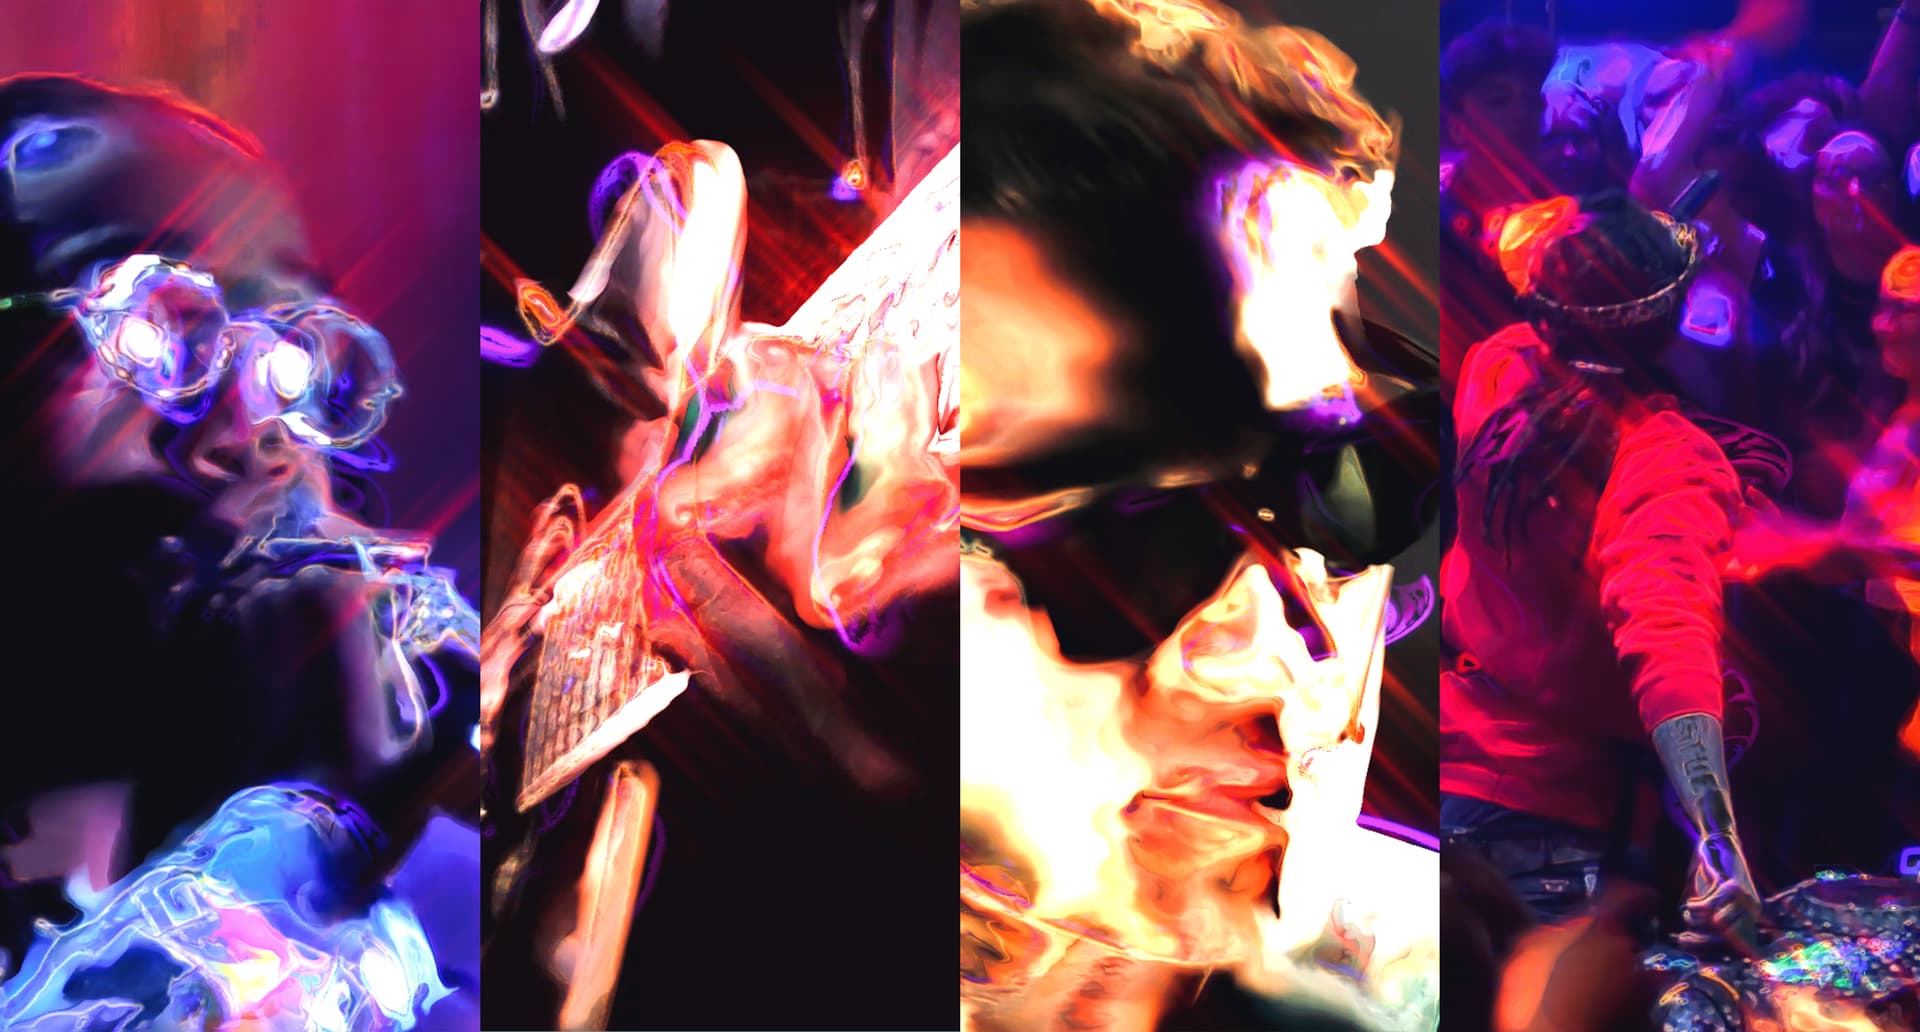
In this tutorial, you’ll learn the basics of 2D video processing to create effects as seen in the video above in real-time. Using Notch and it’s powerful node list, you’ll have instant access to a vast number of post-processing effects, and be hands-on in the process.
Applying real-time post-processing to your video, still image or 3D scene workflow will enable you to get more done in less time; even cut down on render times.
Step 1
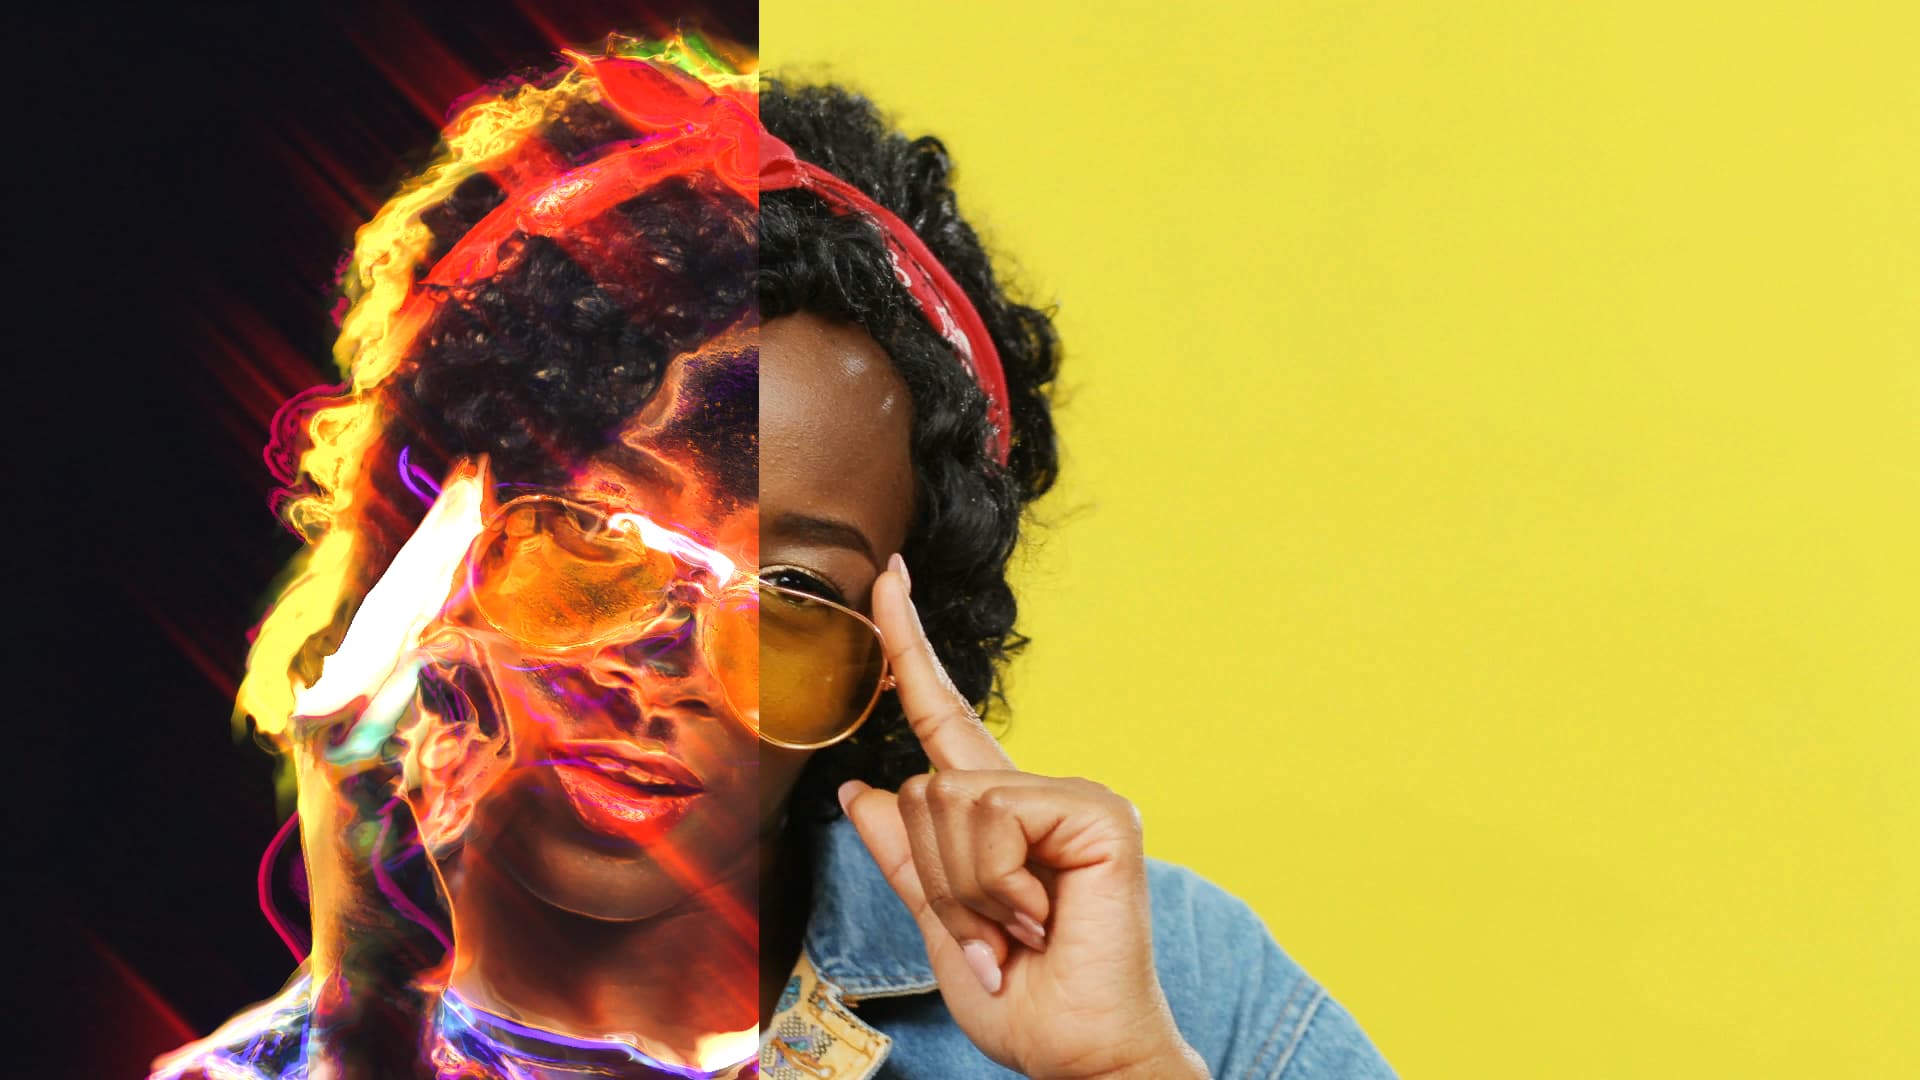
On the left is the effect we are going to make. Notch processes videos with the help of various nodes and node combinations. In this tutorial, we’ll mostly be using Image2D nodes. They are a perfect fit for 2D video processing workflows and offer a variety of handy controls and blend modes.
Tip: stacking order matters in Notch, where processing happens top to bottom. Keep that in mind as you build your node graph.
Step 2
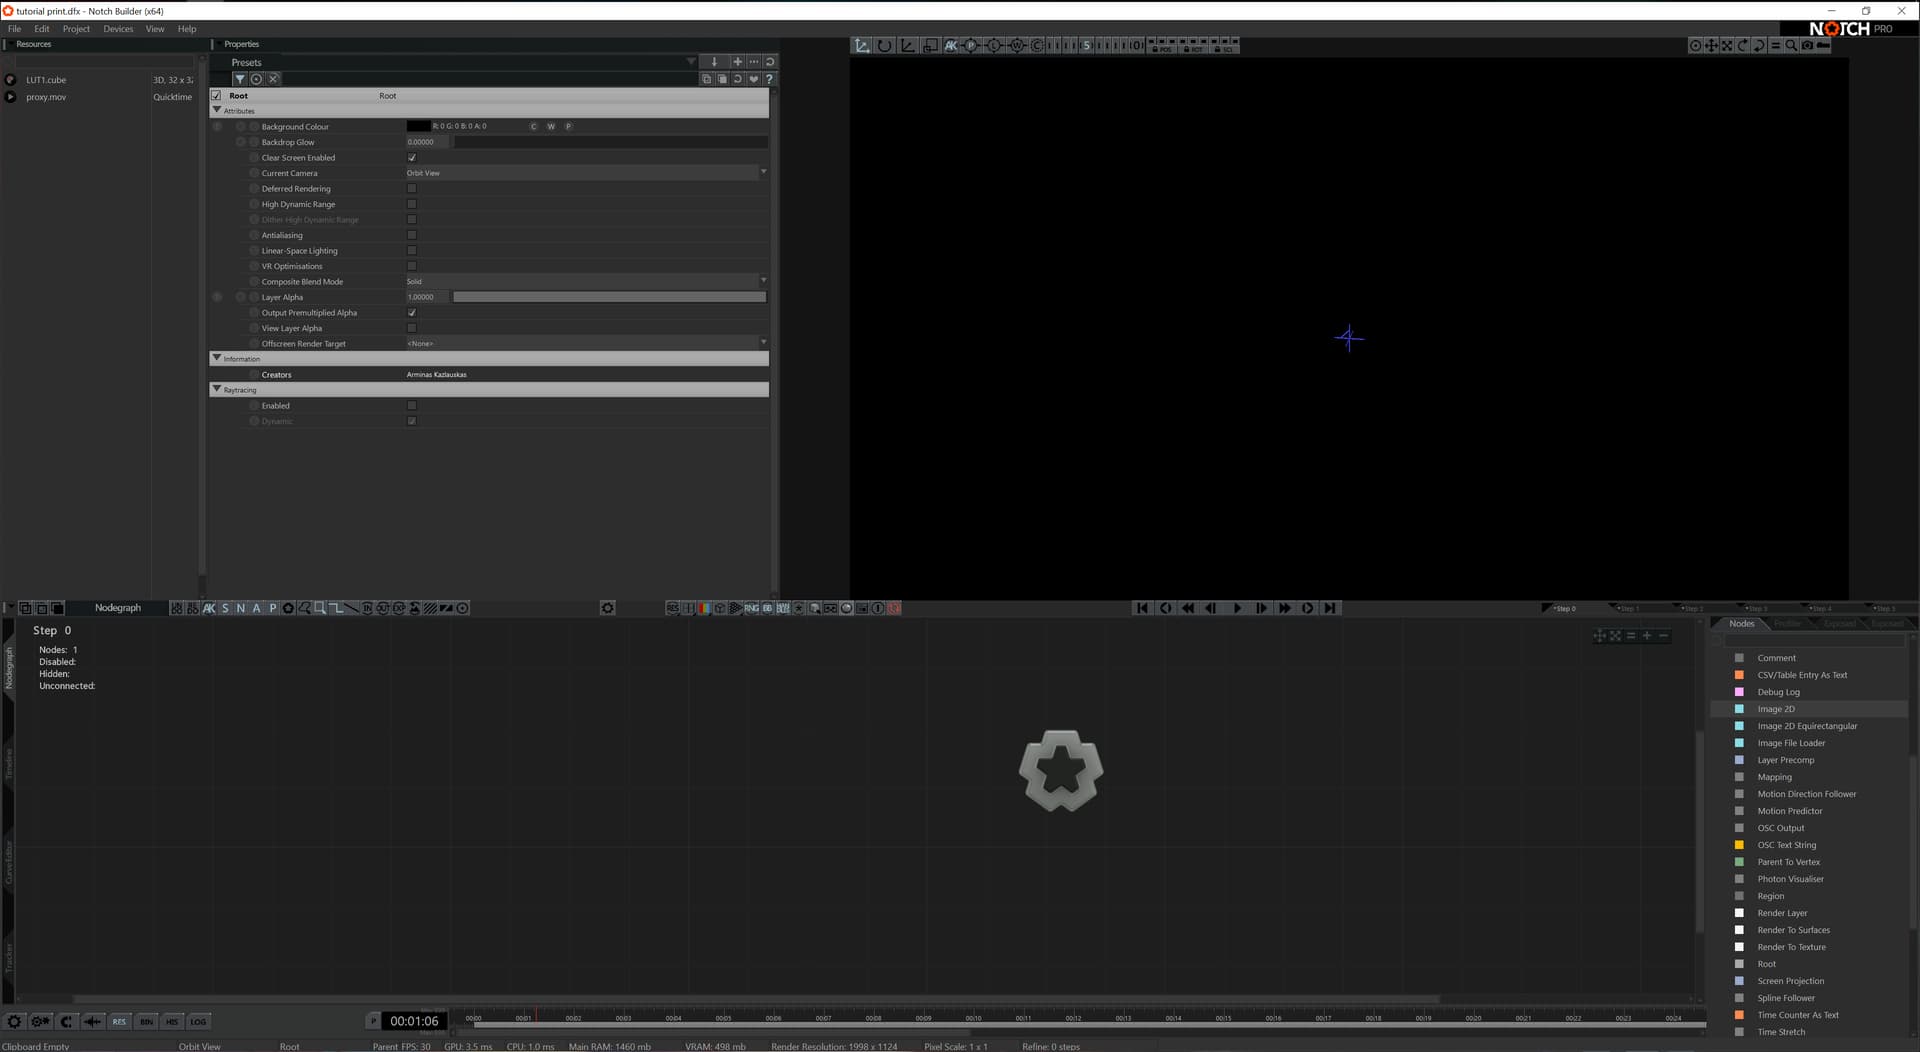
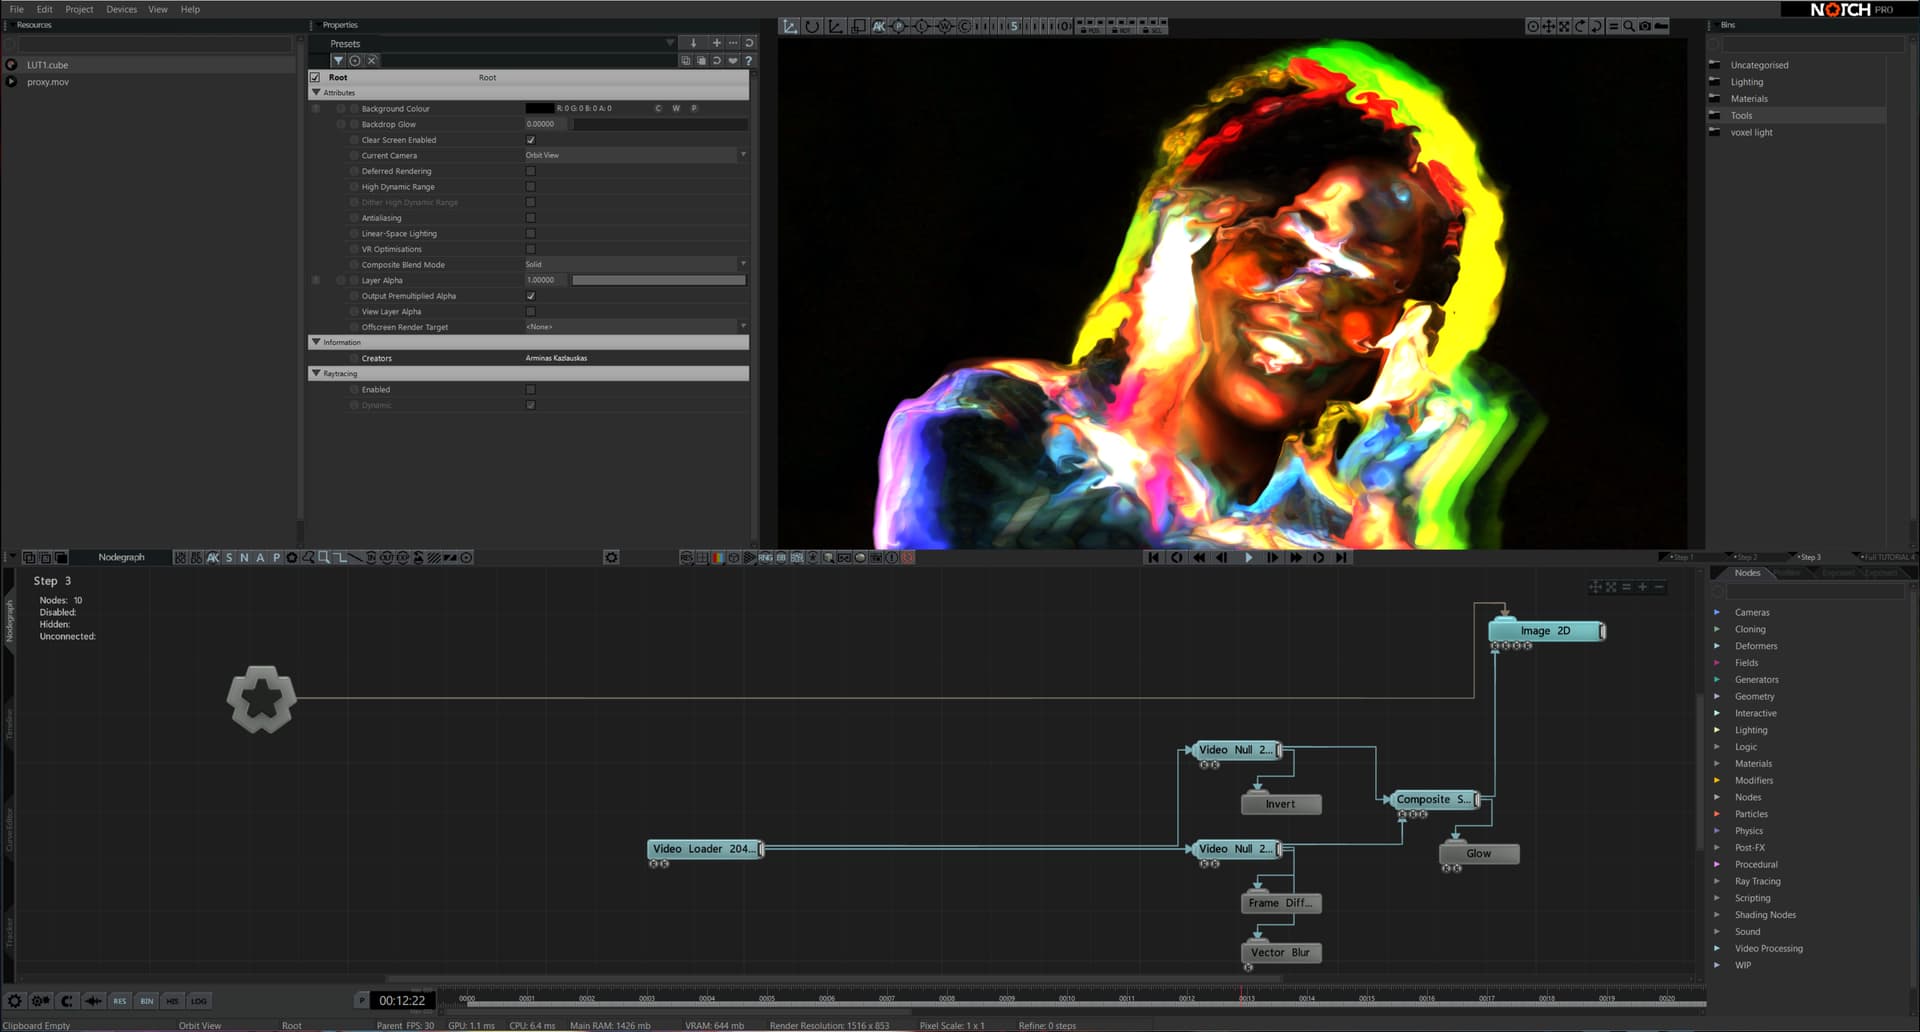
Being a node-based system means we can work in a flexible, exploratory and non-destructive way. All nodes available to us are in the node list or resources tab. We’ll start by creating a blank project.
By default, a new project only has a single one node; the Root node. Here you can set rendering options, scene blend modes and a few other things. The Root node is where you connect other nodes as you build your effects.
Step 3
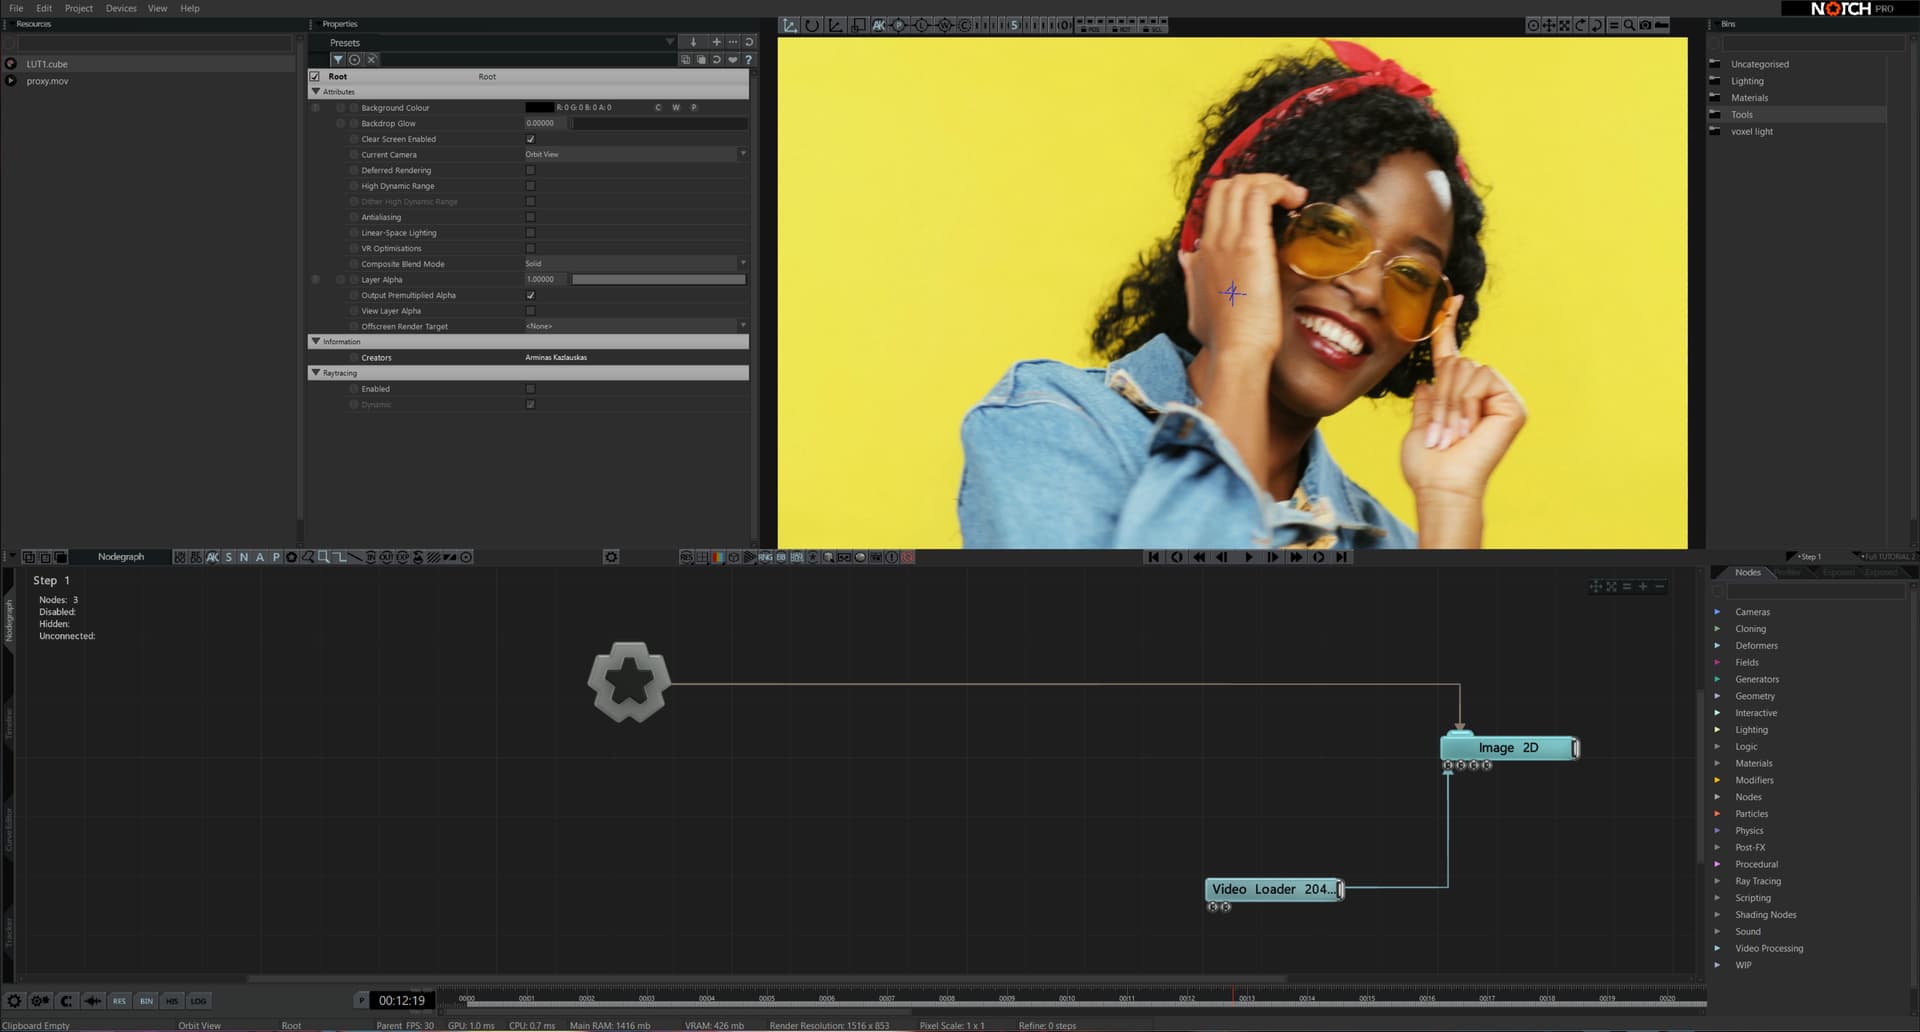
Let’s begin by finding the Image2D node in the node list on the right, and dragging it into the node graph. Parent the Image2D node to the scene Root node and then import a video file by dragging and dropping it into resources panel on the left.
After it’s been imported, drag it into the node graph and connect it to the first input of the Image2D node. Now we have our video rendering set up and we are ready to have some fun.
Step 4
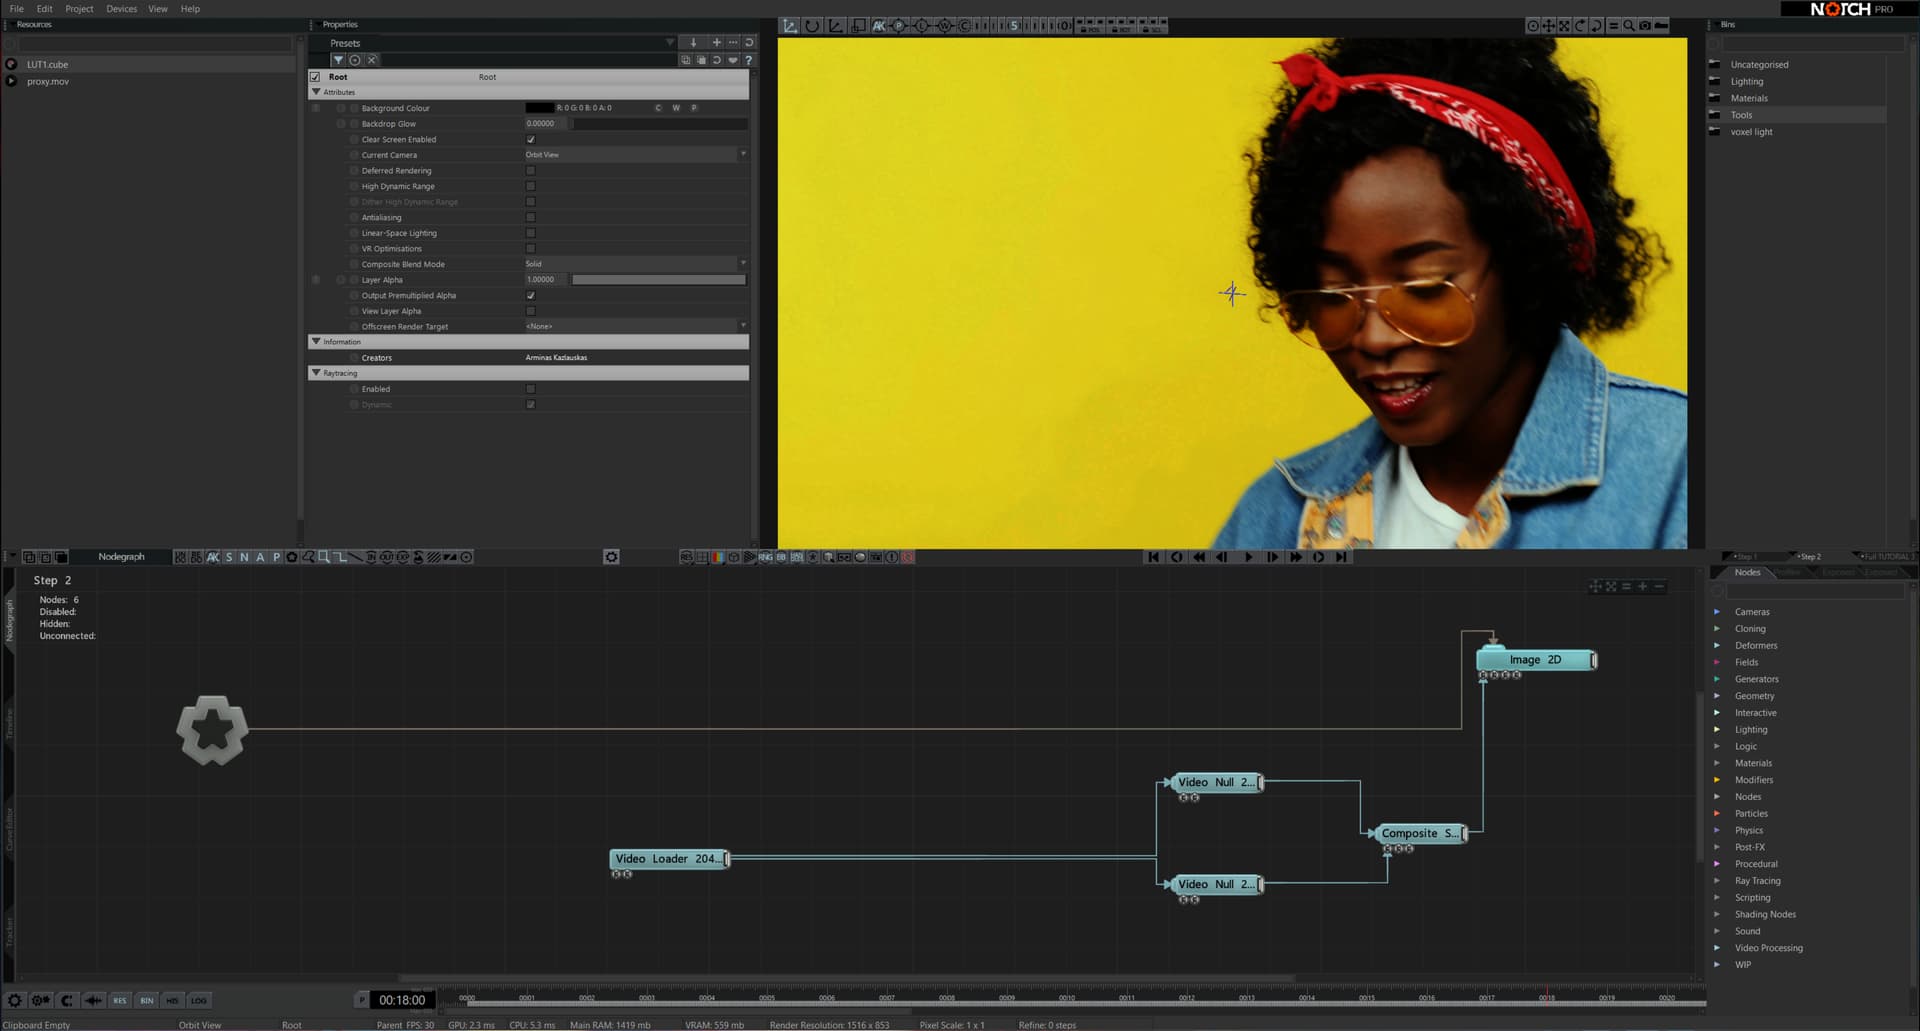
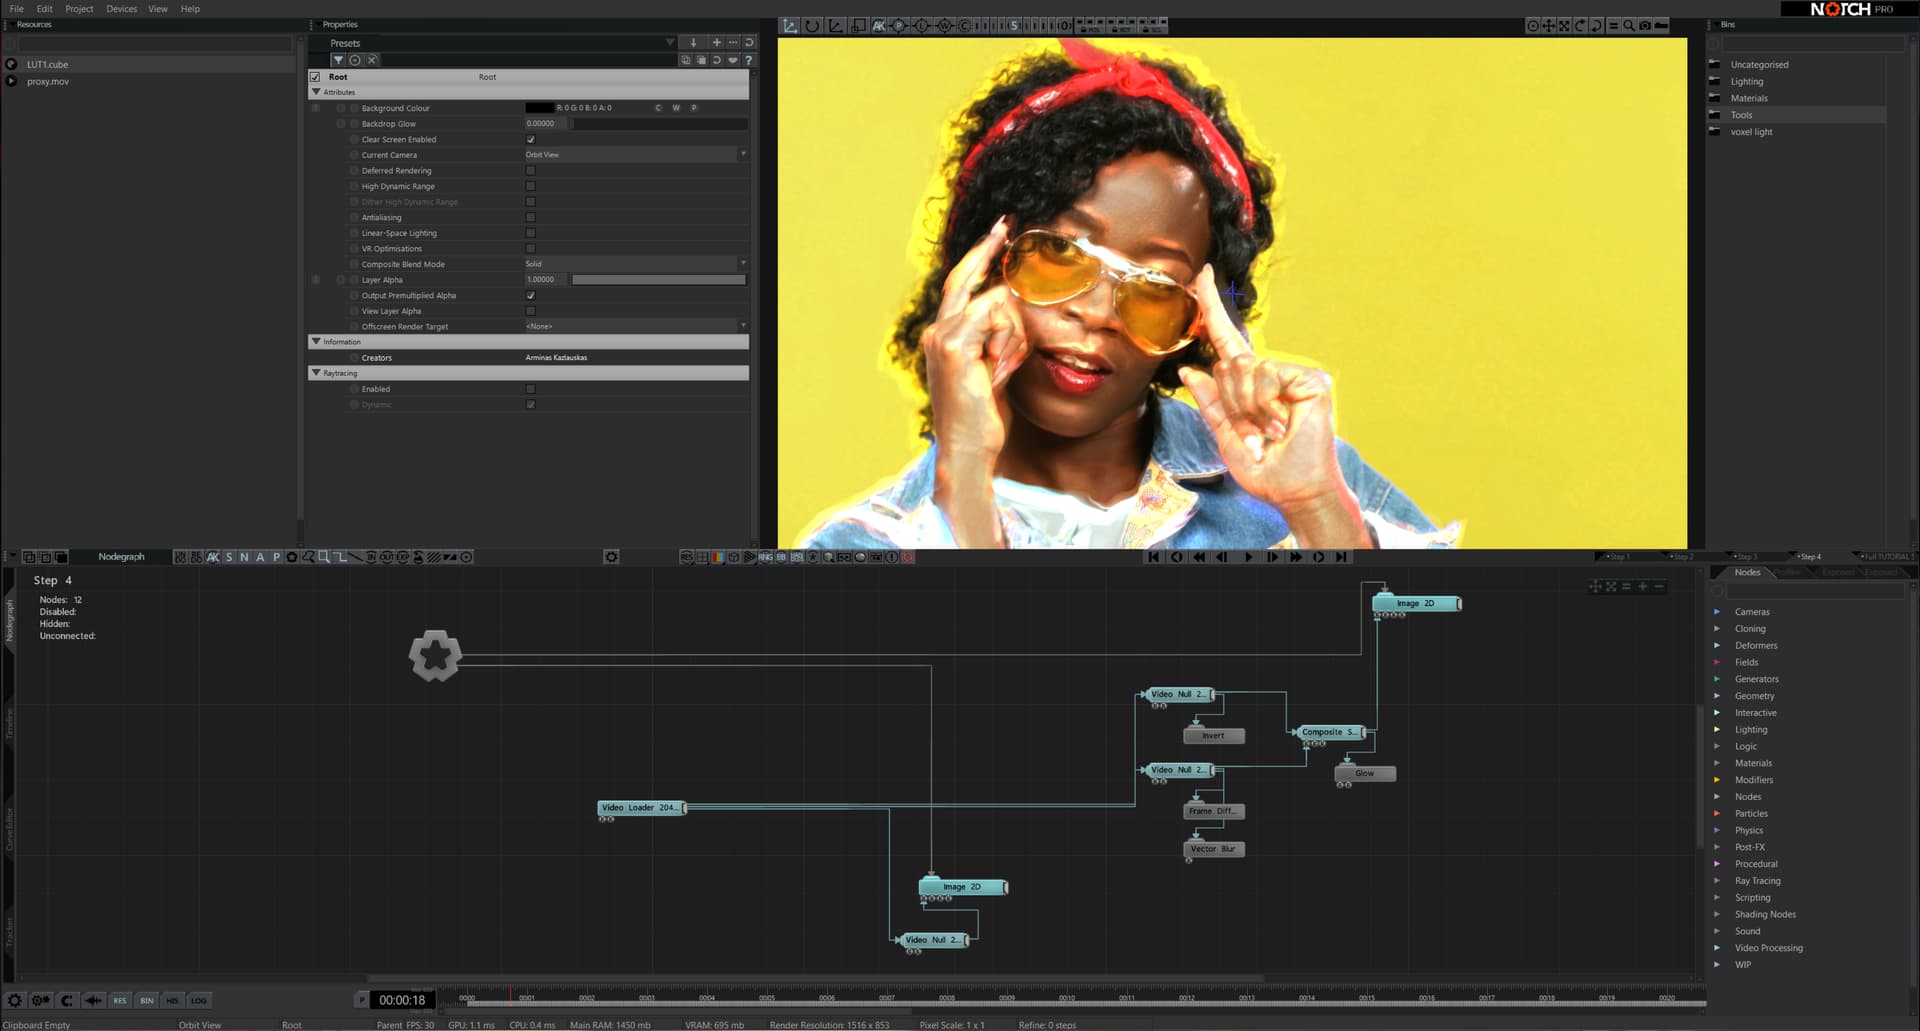
Drag in two Video Null nodes and a Composite Sources node from the node list and into the node graph. Connect the Video Loader into the Video Sources input on both Video Nulls. Next, connect the first Video Null node to the left input of the Composite Sources node and the second Video Null node to the first bottom input (Video Sources).
Set the blend mode to ‘Multiply’ in the Composite Sources node.
Step 5
The Video Null node acts as a copy of the Video Loader. This is very handy when it comes to building more complex node graphs, such as splitting the post effect chain and applying different effects to different parts. The Composite Sources node takes both Video Sources and Video Nulls as input, allowing you to blend them in various ways.
To finish the chain, connect the Composite Sources node to Image2D (Video Input).
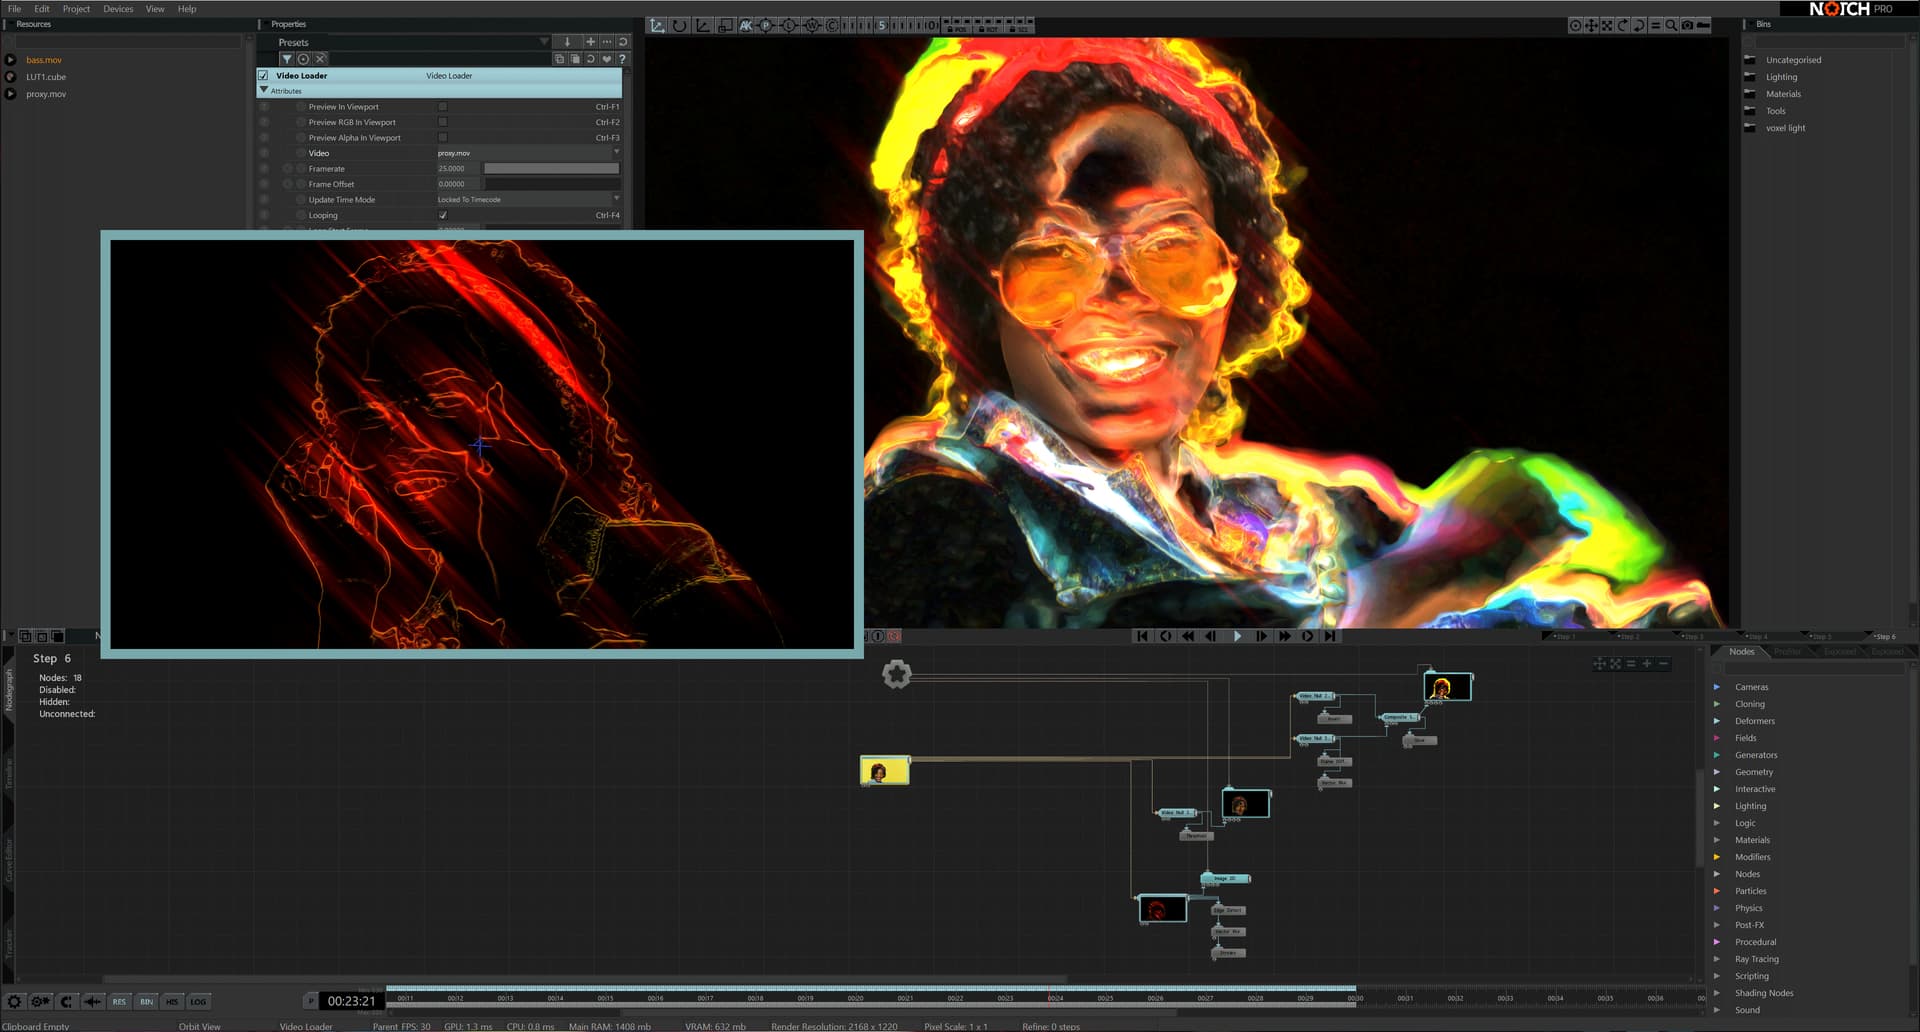
Step 6
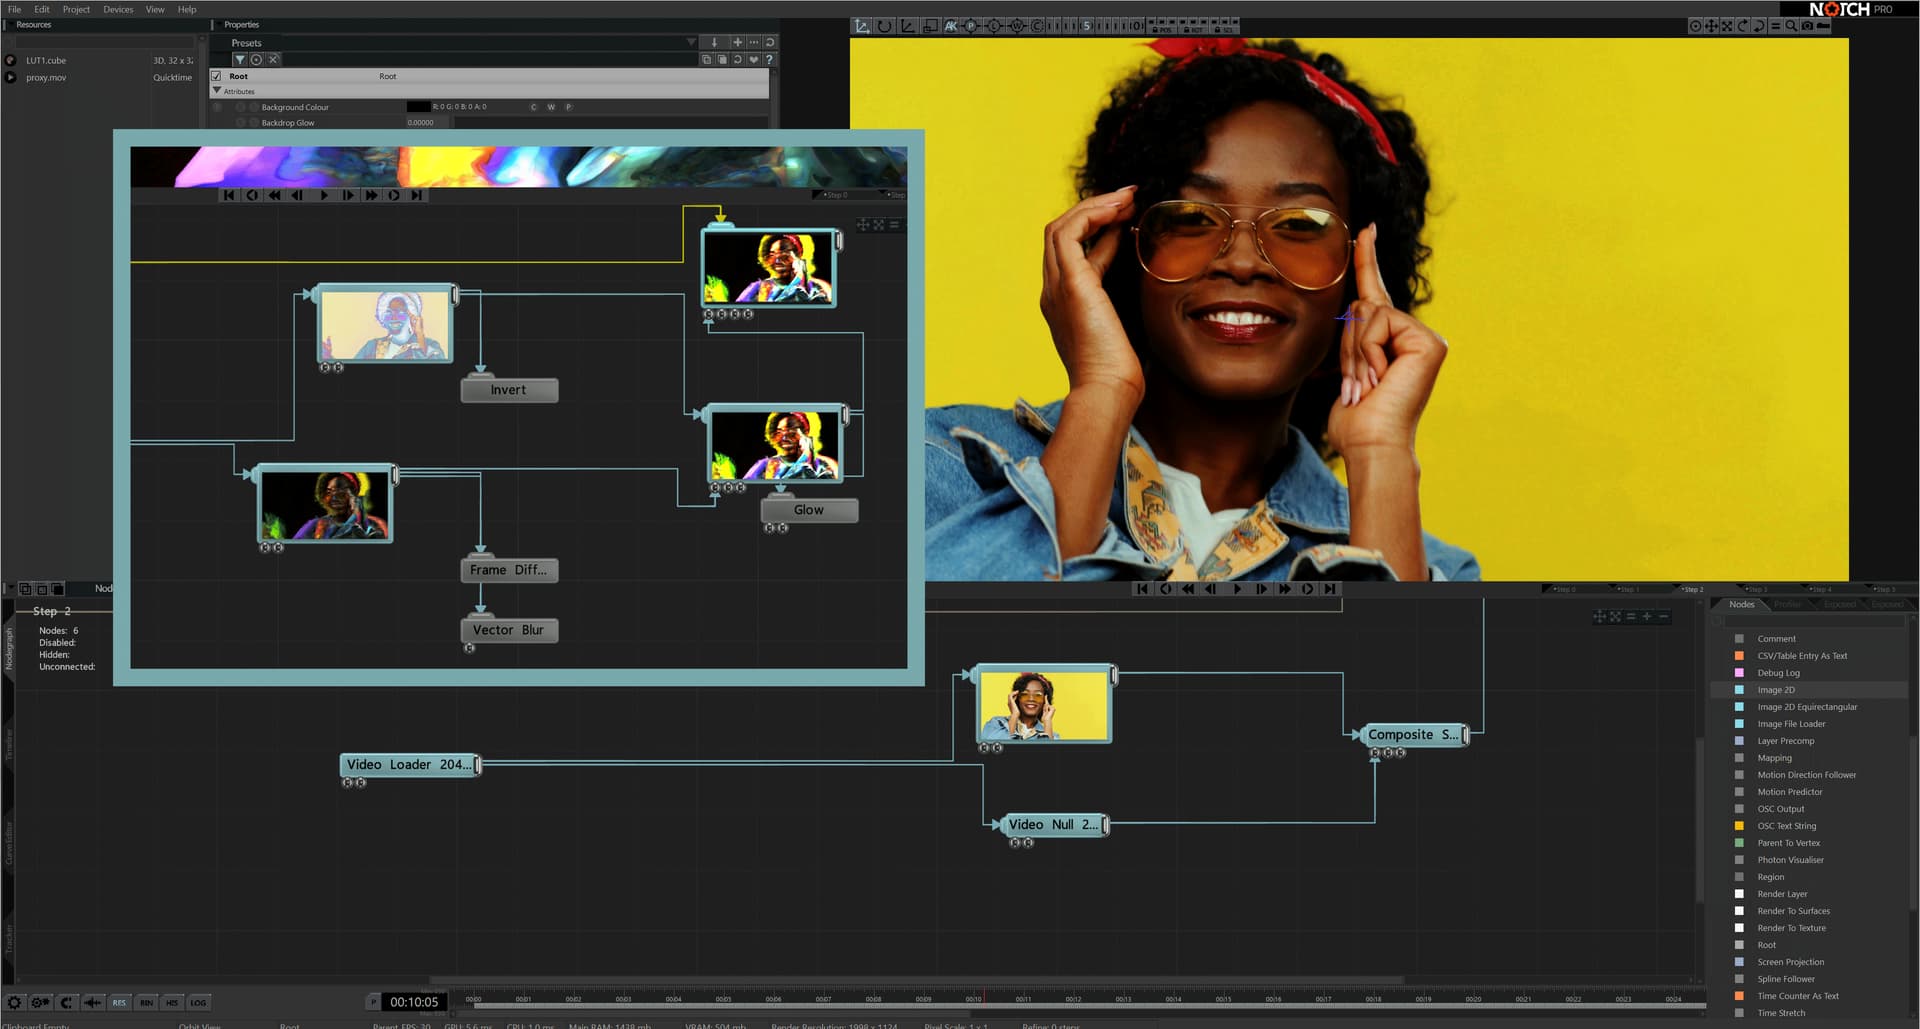
Add the Invert node and connect it to the first Video Null, with the blending mode set to ‘Max’. Then parent the Frame Difference and Vector Blur nodes to the second Video Null.
In the Frame Difference node, set the blending mode to ‘Multiply’ and Num Frames to ‘30’. In the Vector Blur node, set the ‘Steps, Orientation and Dampening’ settings to your liking.
Next, parent the Glow node to the Composite Sources node and set the Intensity to ‘3’. Then change the blending mode to ‘Light’.
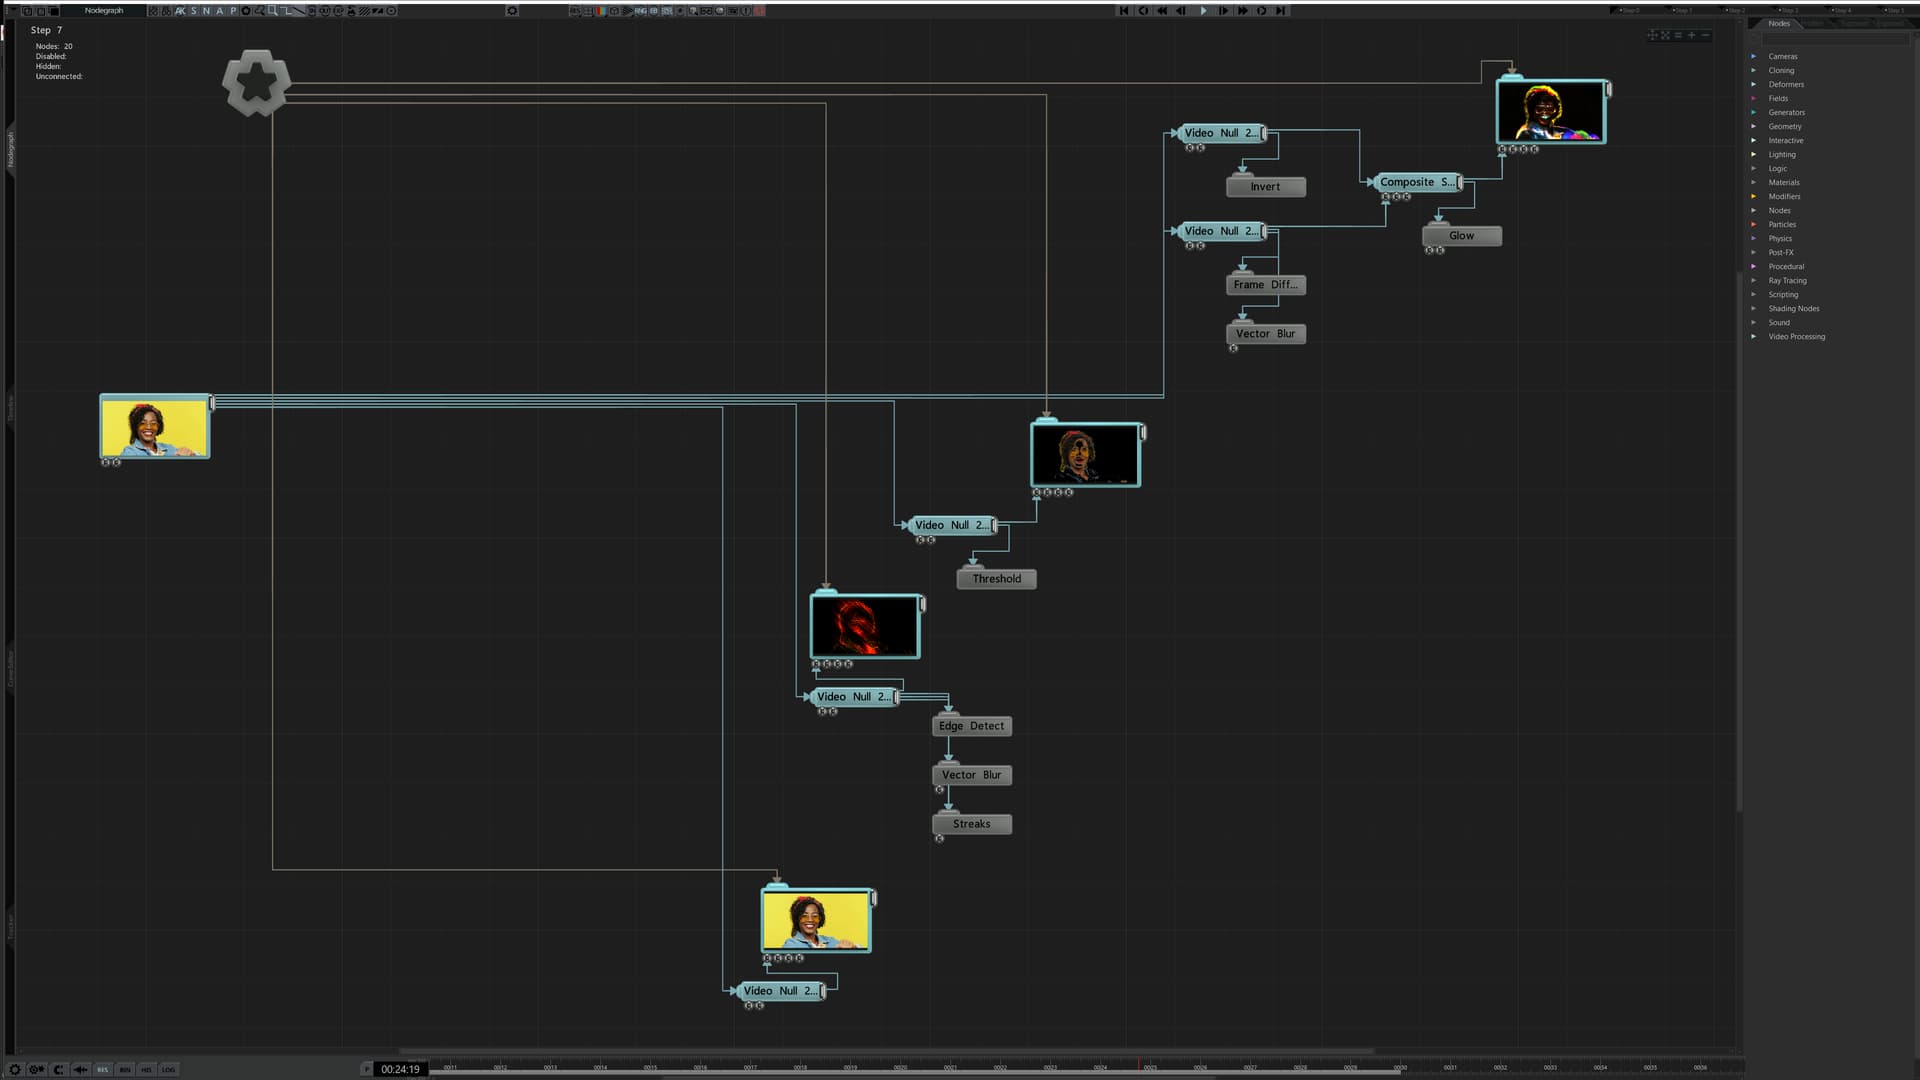
Step 7
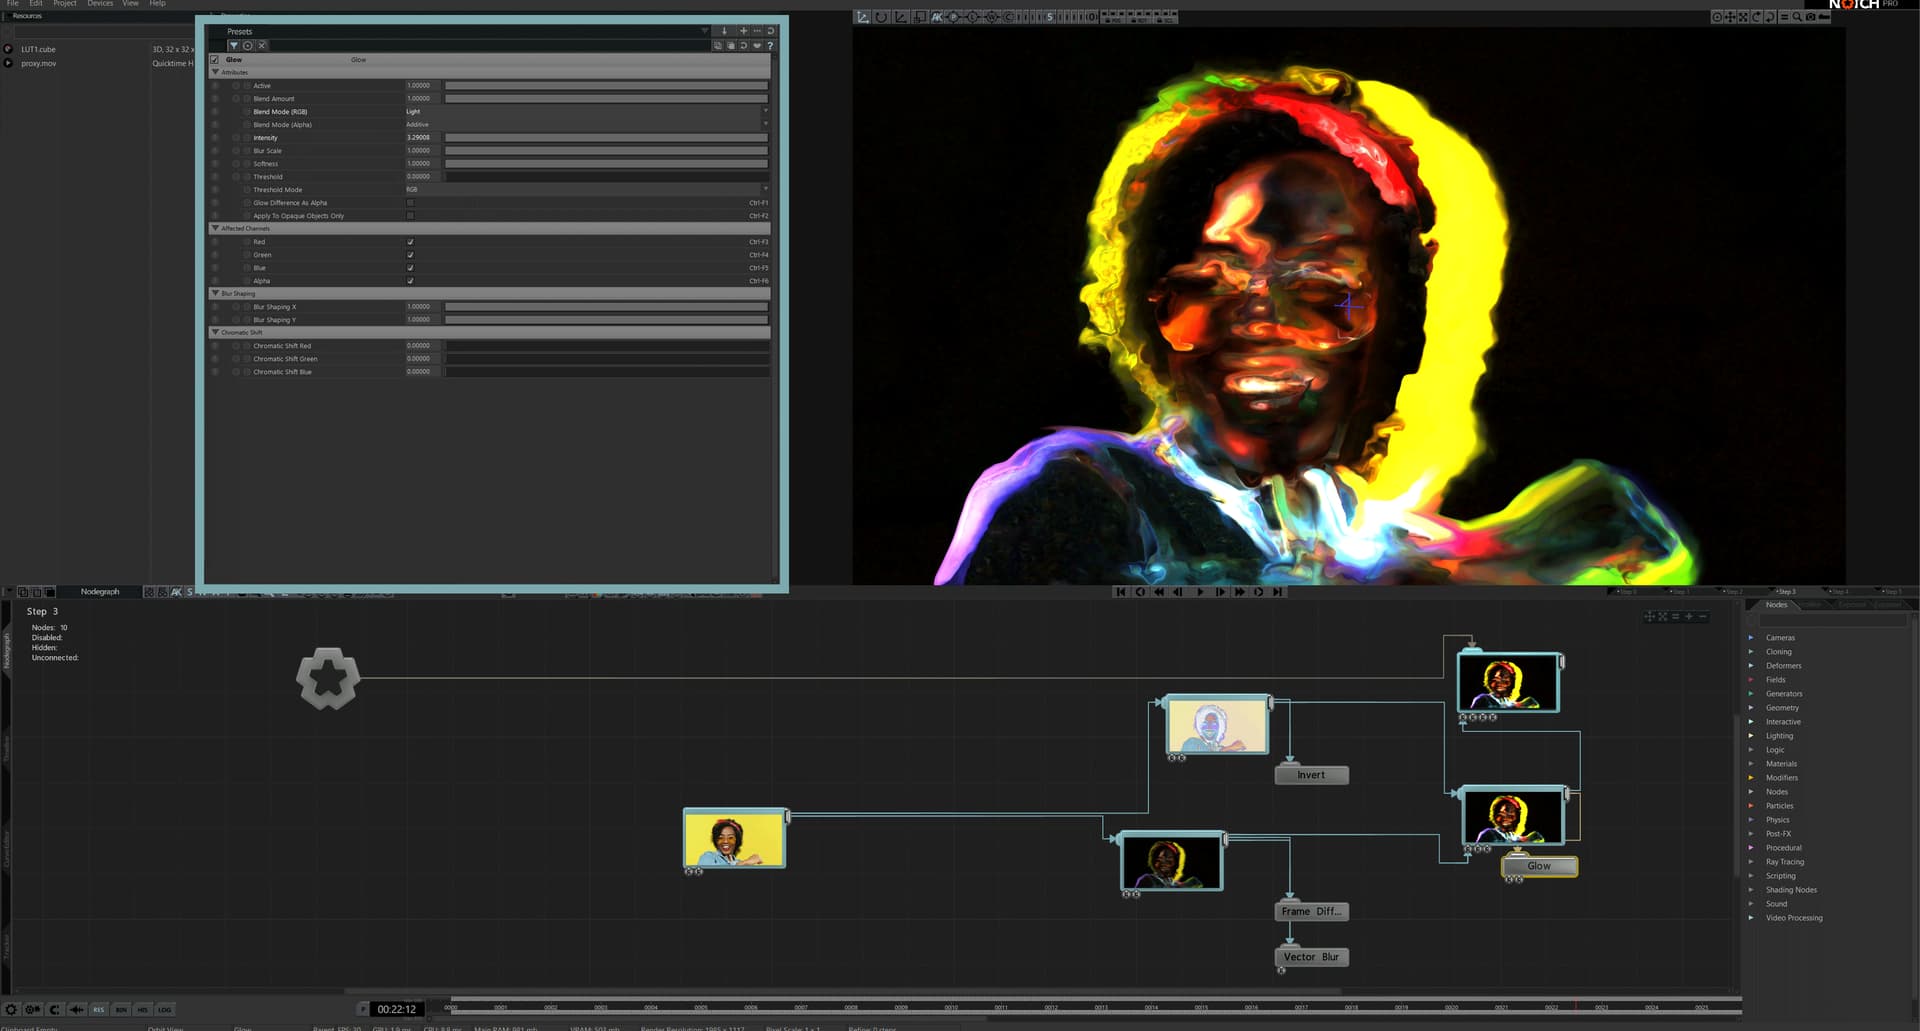
The first part of our post-processing is now complete. You’ll notice the majority of post effects have blending modes available. This feature is extremely powerful when working with video.
Tip: if you want to preview a video or image node in the nodegraph, hold down Shift and double click on the node to expand it into a preview.
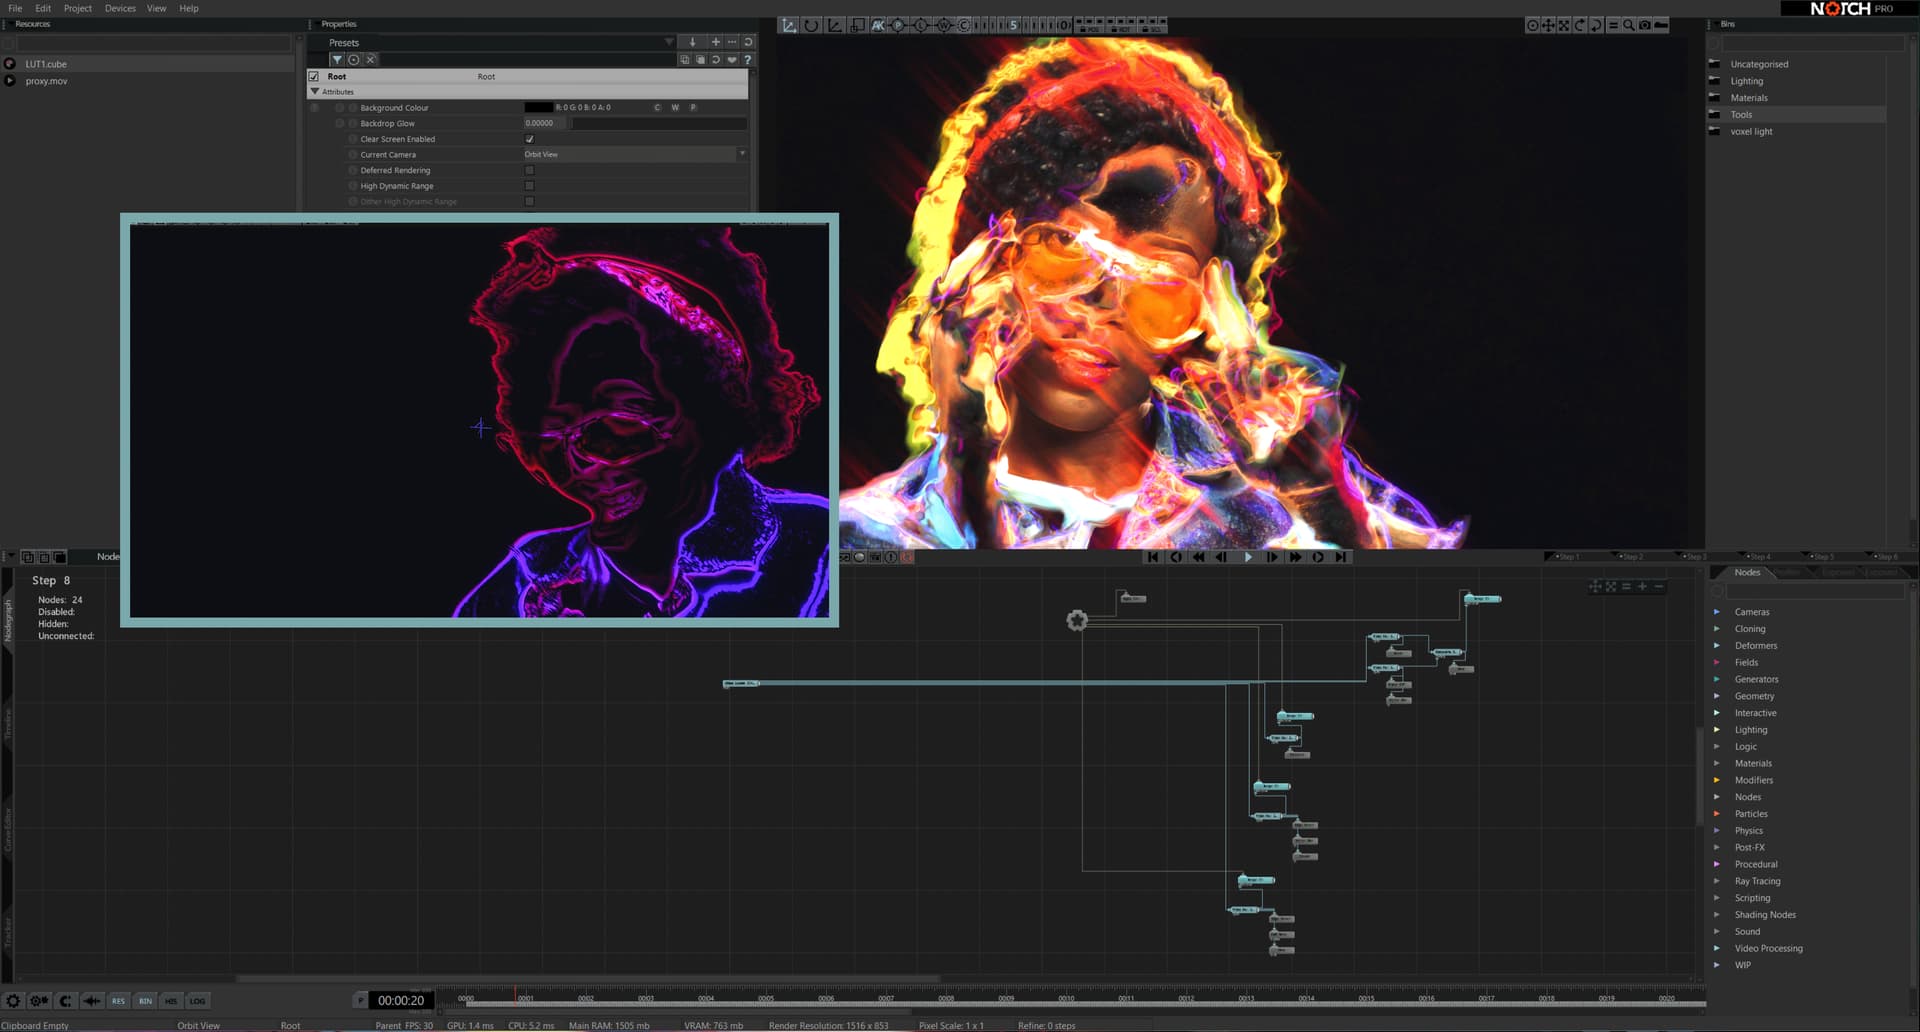
Step 8
Now, let’s add more detail and character to this post-processing chain. Start by setting the blending mode in the Image2D node to ‘Additive’, and the aspect-based scaling mode to ‘scale X’.
Copy the Image2D node (select it, then press Ctrl + C ) and paste it ( Ctrl + V ) under the first one. Get another Video Null node from the node list and connect it to the Video Loader node. Then connect the Video Null node to the first input of the fresh Image2D node.
Step 9

Add a Threshold node from the node list and parent it to the Video Null. Set the following parameters:
- Blending mode - Min
- Threshold - 0.2
- Falloff Range - 0.4
- Fallow Power - 1.5
- Mode - Below
Copy the second Image2D node you just made and paste underneath the other two. Add and connect a Video Null between Video Loader and Image2D, like before.
Step 10
Parent the following nodes to the new Video Null and adjust the parameters accordingly:
- Edge Detect: Orange colour via the colour picker. Width - 2
- Vector Blur: Steps - 63. Orientation - 111. Epsilon - 0.19
- Streaks: Streak Length - 3.4. Intensity - 0.9. Threshold - 0.4
Step 11
Again, we will make a copy. This time it’s the Image2D node you just made and this time too make sure to paste it lower in the node graph. Set its blend mode to ‘max’.
Add another Video Null node and connect the video loader to it. Connect the Video Null to the first input of the Image2D you just made.
Step 12
Parent the following nodes to the new Video Null and set their parameters as follows:
- Edge detect: Violet colour. Width - 7
- Curl Noise: Displacement amount - 0.5. Noise Scale - 0.8. Edge Fade Distance - 0.3
- Glow: Threshold - 0.4
As the last step, drag-and-drop a LUT.cube file and parent it to the Root node of the scene for some quick-and-dirty colour grading.
Step 13
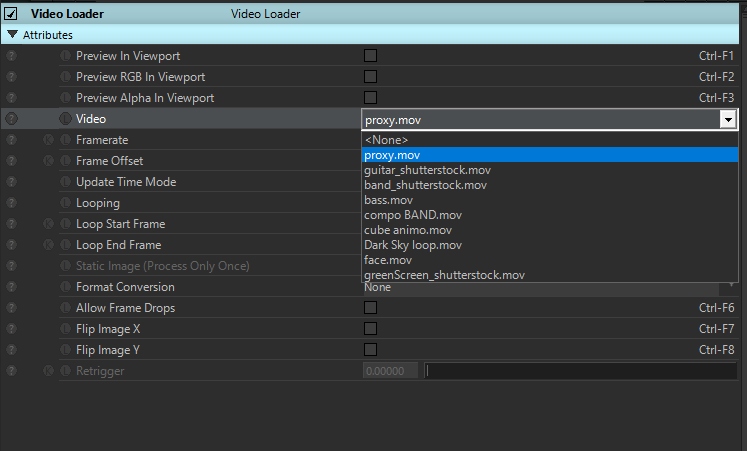
Your post-processing chain is now set up, but the experiment continues! Now you can tweak the parameters while seeing the results in real-time. You can even drag-and-drop more videos into your project to try out your chain on other material as well.
Tip: in the Video Loader node there’s a quick-select drop down where you can access all the videos in your resources panel without having to add them to your node graph.
Step 14
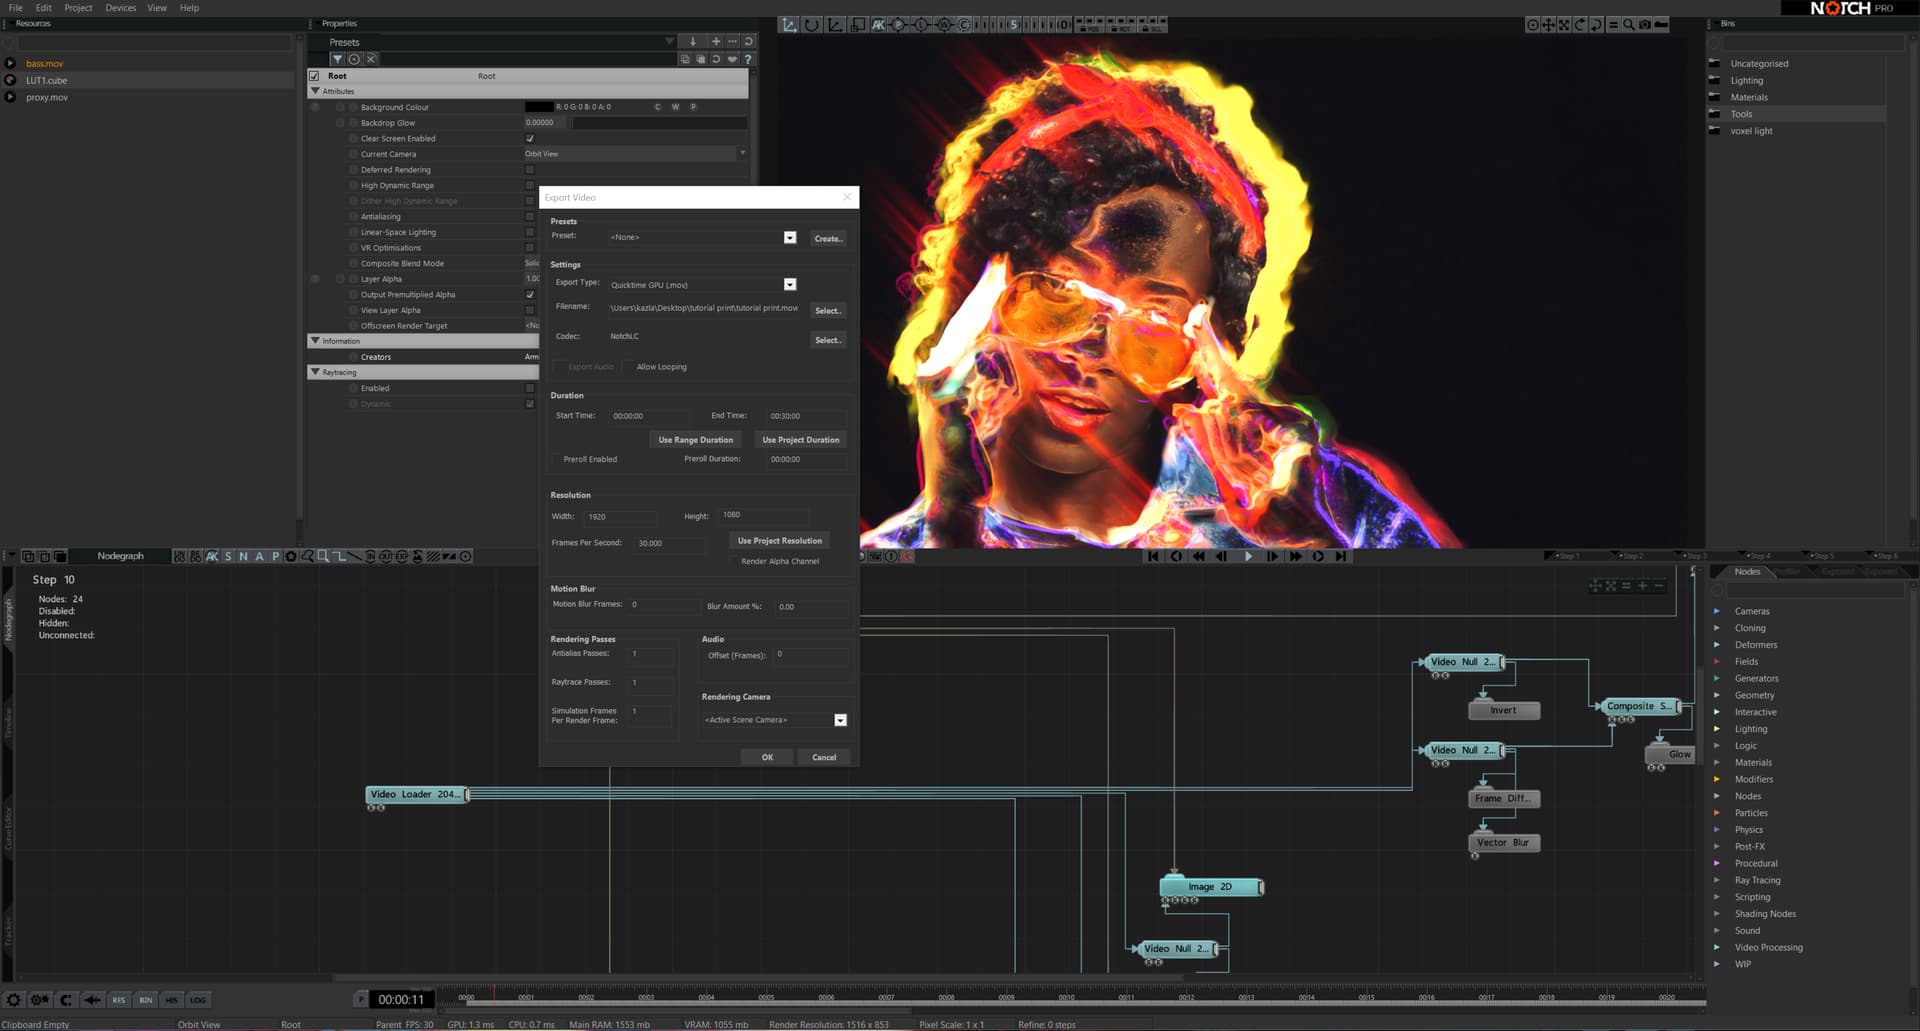
Once you have something you want to share with others, go to File > Export Video . Here you can set your video rendering parameters, location and codecs.
Step 15
Everything you’ve done in this tutorial applies to any sort of content you can build or import into Notch such as images, video and 3D. This means you’re not limited to just working with pre-rendered video.
So go on, have some fun. Working in real-time opens up brand new ways to work with graphics. It adds in the joy of accidental discoveries, making being an artist even more rewarding.