Is there an easy way to deform or add noise to a spline in itself? The way I do it now is by adding a math modifier to each spline point set to perlin noise. With larger compositions this gets a bit unwieldy though.
Interesting idea that - right now you could deform the geometry after a spline is generated, but you cant directly deform a spline. I’d imagine that a few of the deformers wouldn’t translate (splines are a totally different datatype to geometry), but I’ll talk to the dev team and see what their thoughts are.
For now, depending on the use case, you should be able to just deform the spline mesh and work with that instead.
– Ryan
1 Like
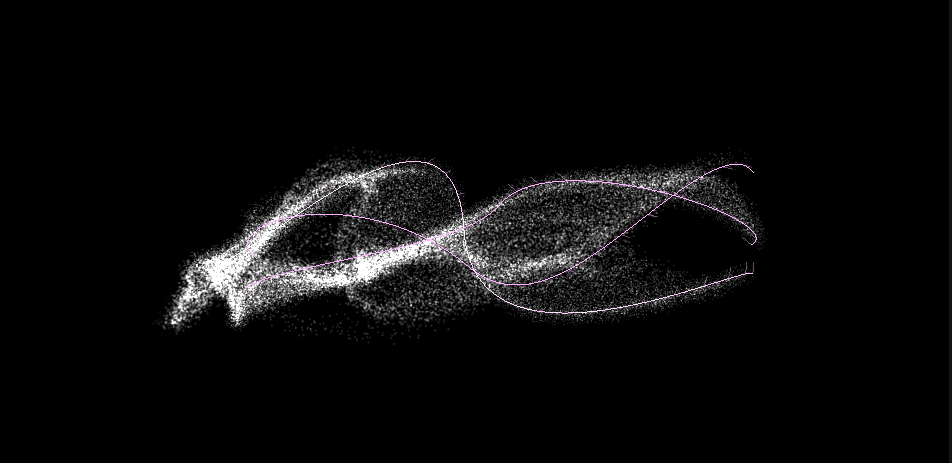
Thanks Ryan! I forgot to add a context which in this case was a spline emitter for the particle system. When running it with affectors only, you’ll end up with something like this:
This is fine, however a bit static in its expression. This due to the splines constantly emitting from the same position, making the image look more or less the same throughout the animation.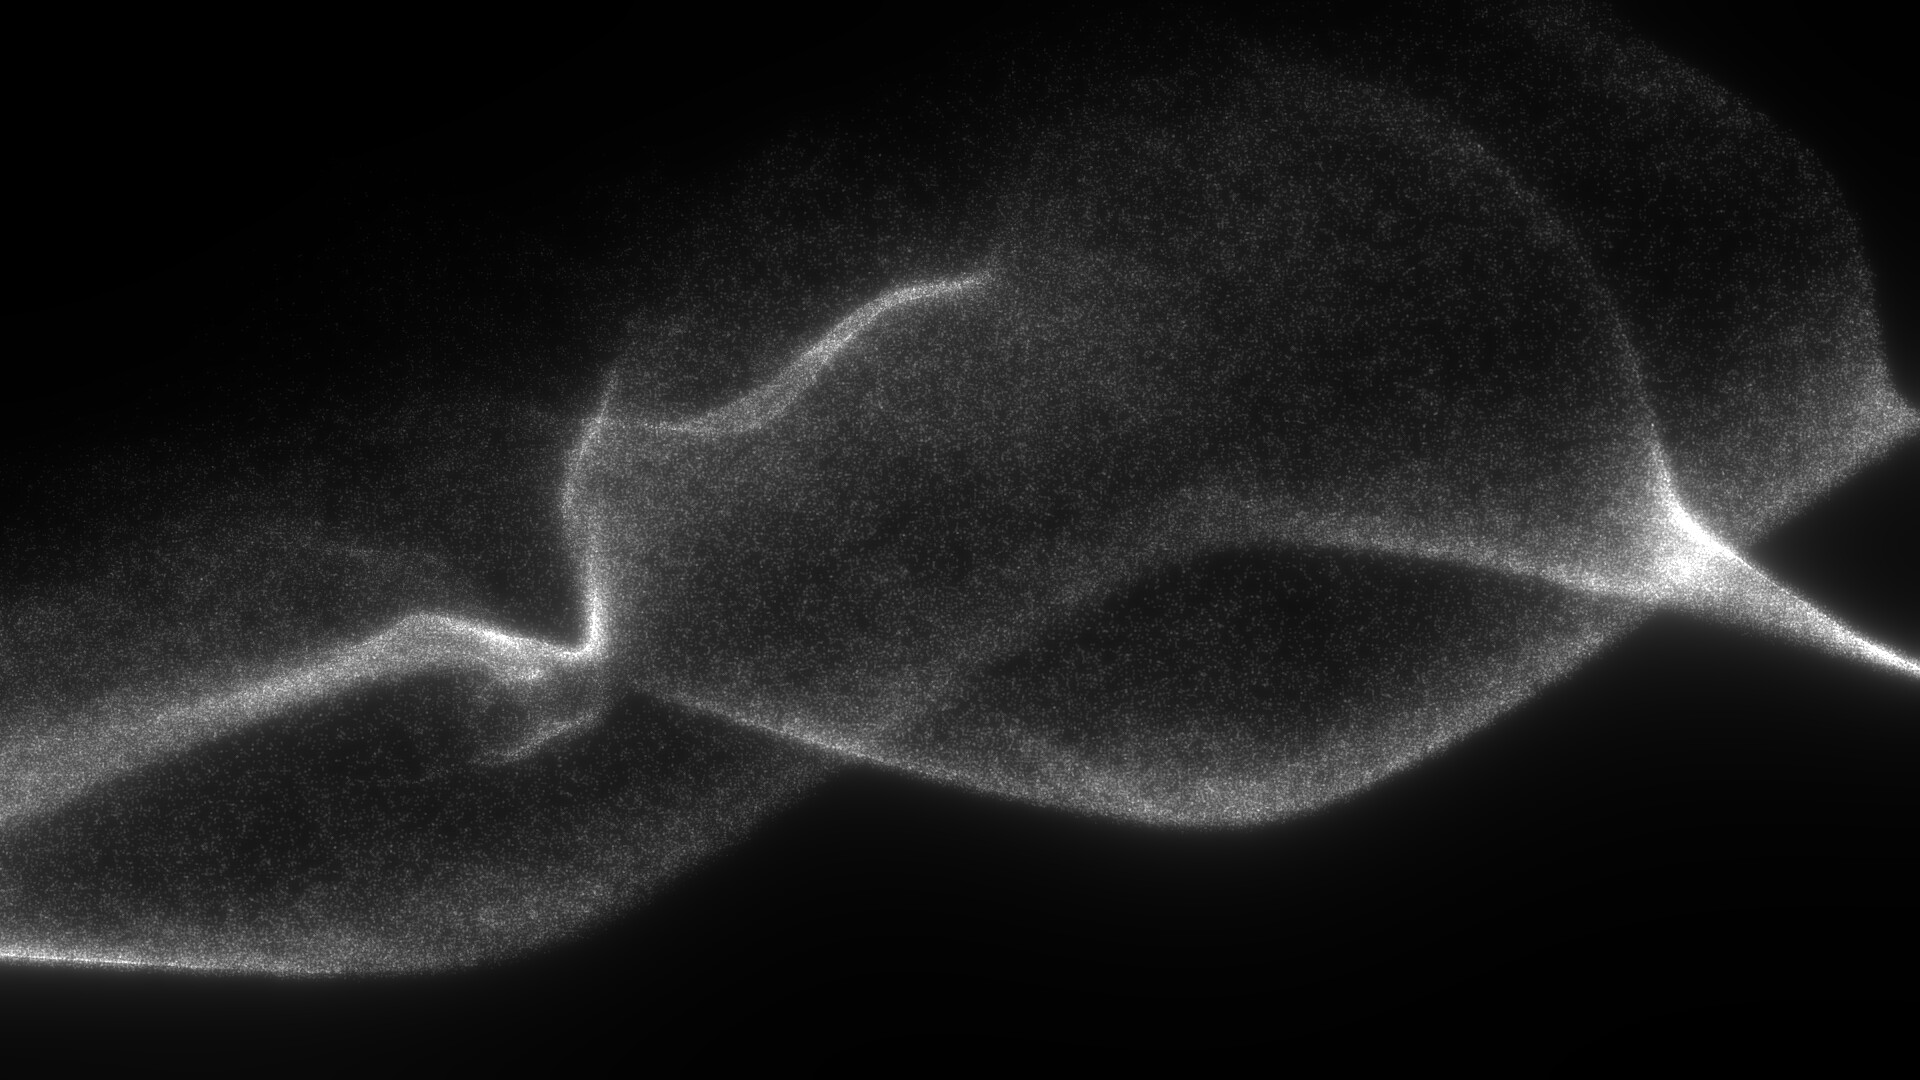
If you add some perlin noise to the control points, the composition seems to come a bit more alive.
While there are hints of the splines, these will constantly evolve throughout to make for a more living flow.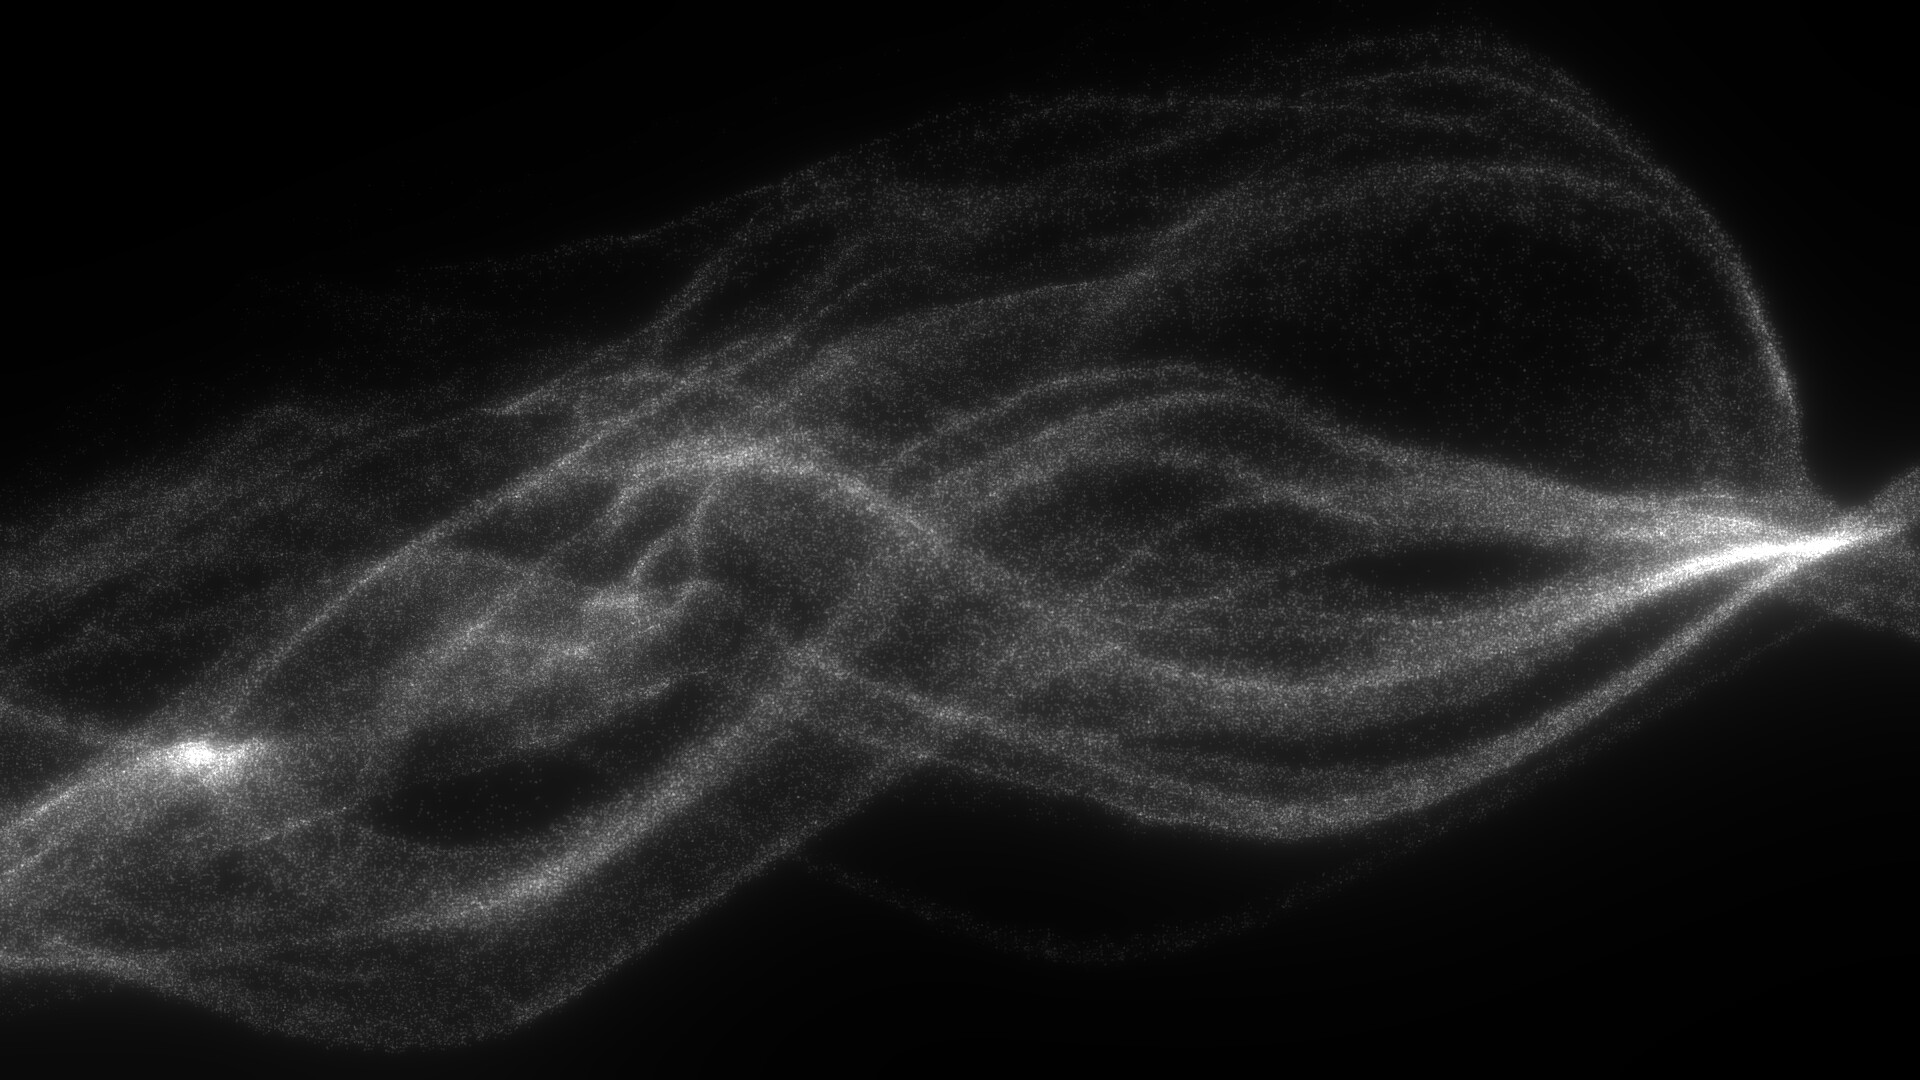
Very Nice! Yeh being able to deform splines would be really cool - it’s just not something that plugs into the existing system easily. If you converted it to geometry with an extruded spline, then you could emit from the mesh instead - which could work in tandem with a spline affector.
– Ryan
Thanks! I’ll try that. I also started thinking if it could be done with a JS node, but I’m not sure how efficient that would be if the perlin field has to be calculated as well.
Hey Martinus,
I’ve just been browsing all notch touch points trying to make something almost exactly like this! would you mind sharing how you came to this look? its looks amazing!
P.s sorry Im not in anyway answering your question, just leaching off your idea 
Hi! Sorry about the late reply. If I remember correctly this is a rather simple collection of splines, positioned to intertwine (like a screw-ish). Then math modifiers with perlin noise as output, and with different seeds/starting points, are added to each control point. The splines were then used as both particle emitters and affectors I think. Spline follower or something like that. It might be that the emitter is a sphere offscreen as well.
It is a relatively simple build, but the amount of modifiers necessary makes it somewhat of a pita to manage (hence the FR). I’d suggest making one spline with attached modifiers first, then copying it and rotating the splines/changing the parameters of the modifiers as needed to make it a bit easier to deal with.
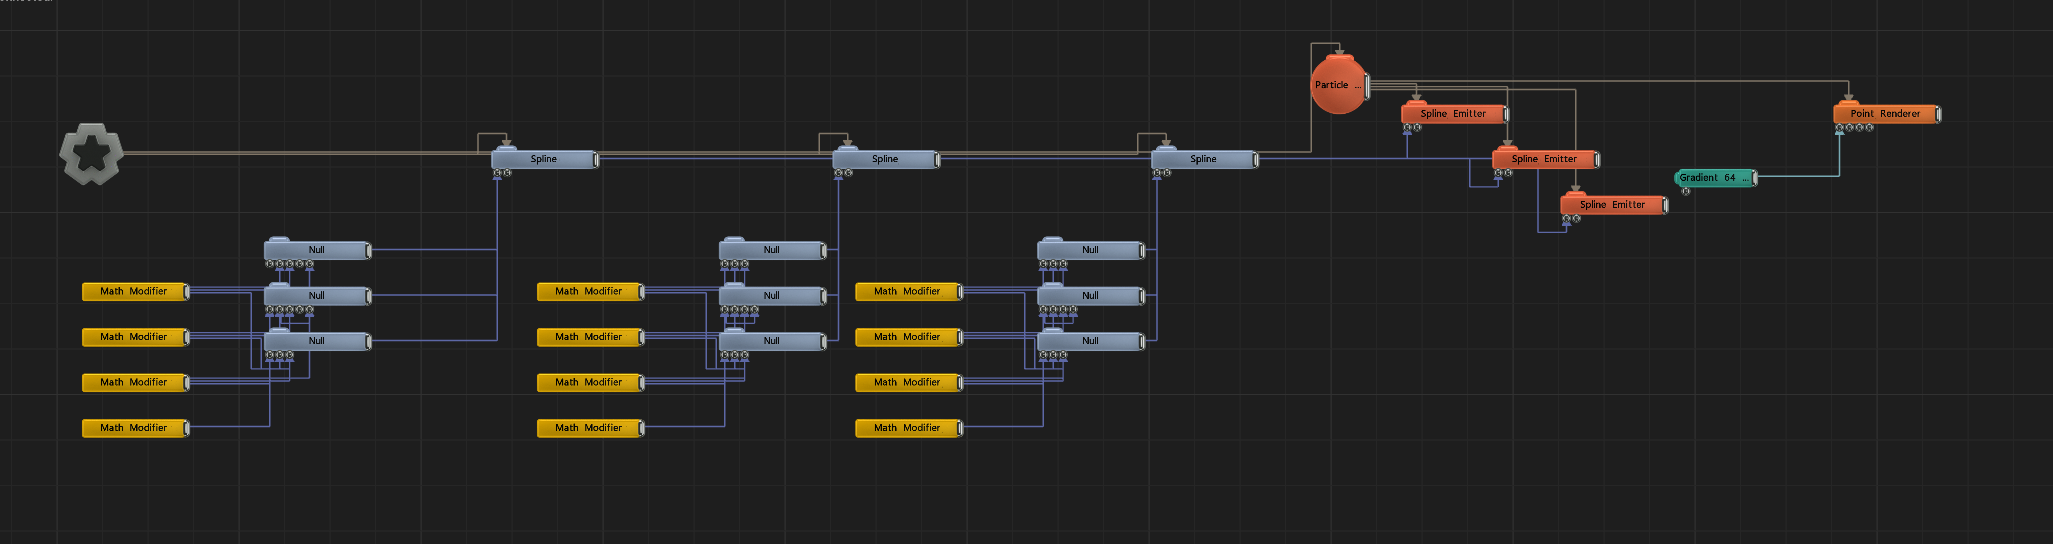
This is more or less it. Position and twist the nulls as wanted, add math modifiers to y/z positions, and scale, and also for the center x position for each spline. Emit from spline and play around with initial spline direction velocity/follow spline amount & rate. Use blend mode add for the particle renderer and adjust alpha/size as needed.