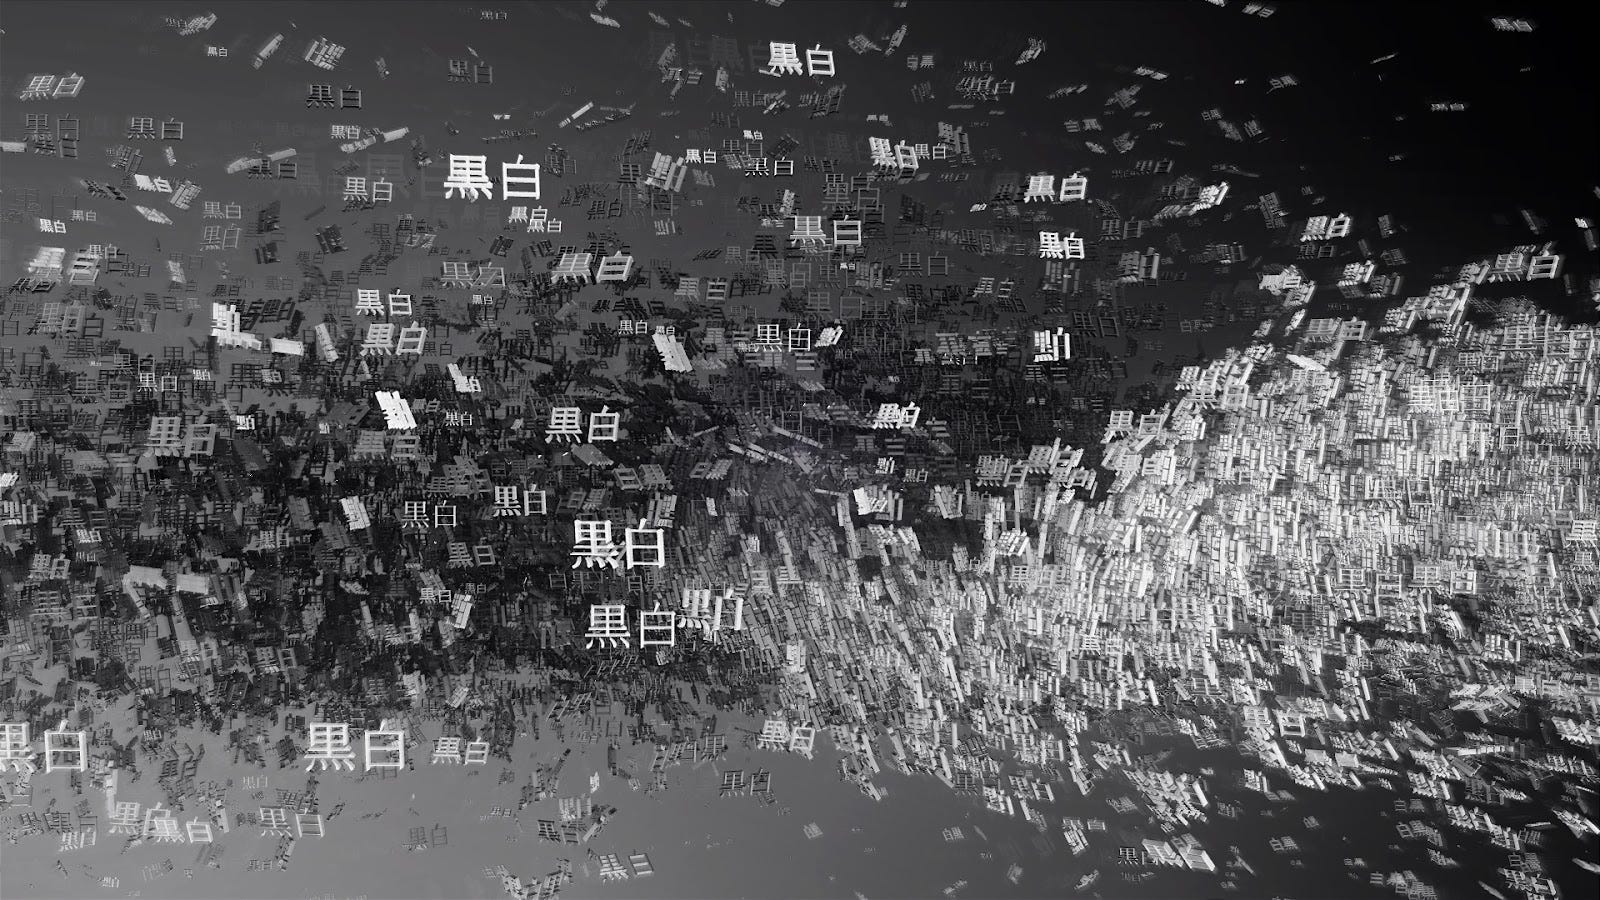
A Walkthrough of Kotoe Kikuchi’s “Abstract-83”
Note: this is a follow-up to our interview with Kotoe Kikuchi. If you haven’t read that yet, be sure to check it out here!
Kotoe Kikuchi is a visual designer living and working in the Tohoku region of Japan. She majored in Computer Graphics at HAL Tokyo and Digital Hollywood Tokyo. After working as a CG designer at a game company, she began freelancing full-time in 2022, working on video production for projection mapping projects and events.
In this walkthrough, Kotoe describes how to create an audio-reactive visual using Notch’s Particle System. You can download the project file and assets here.
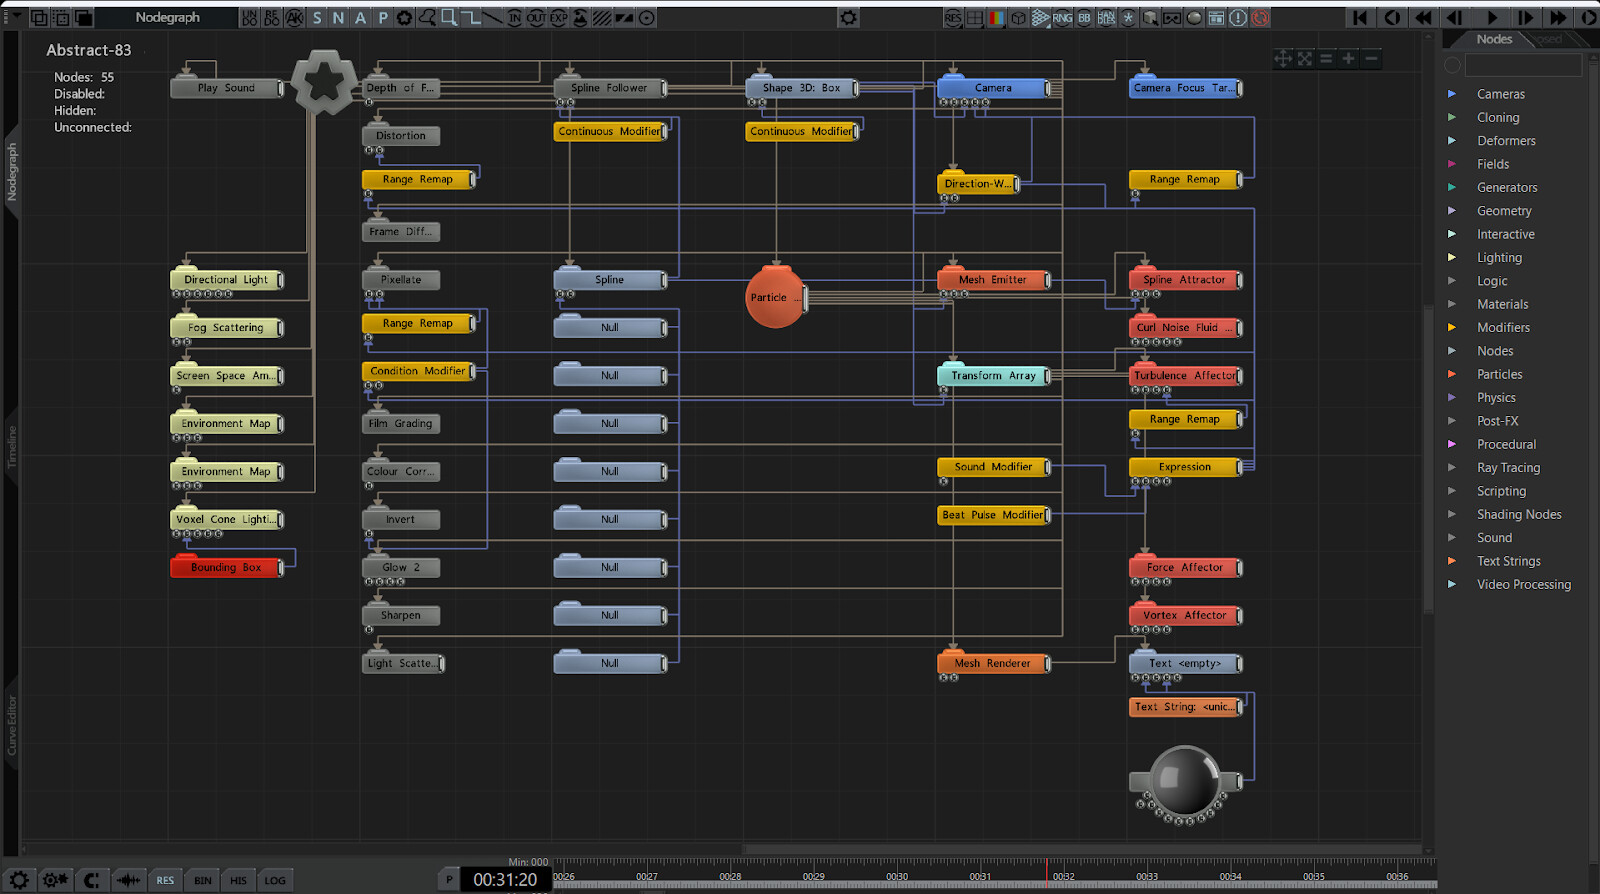
All Nodes
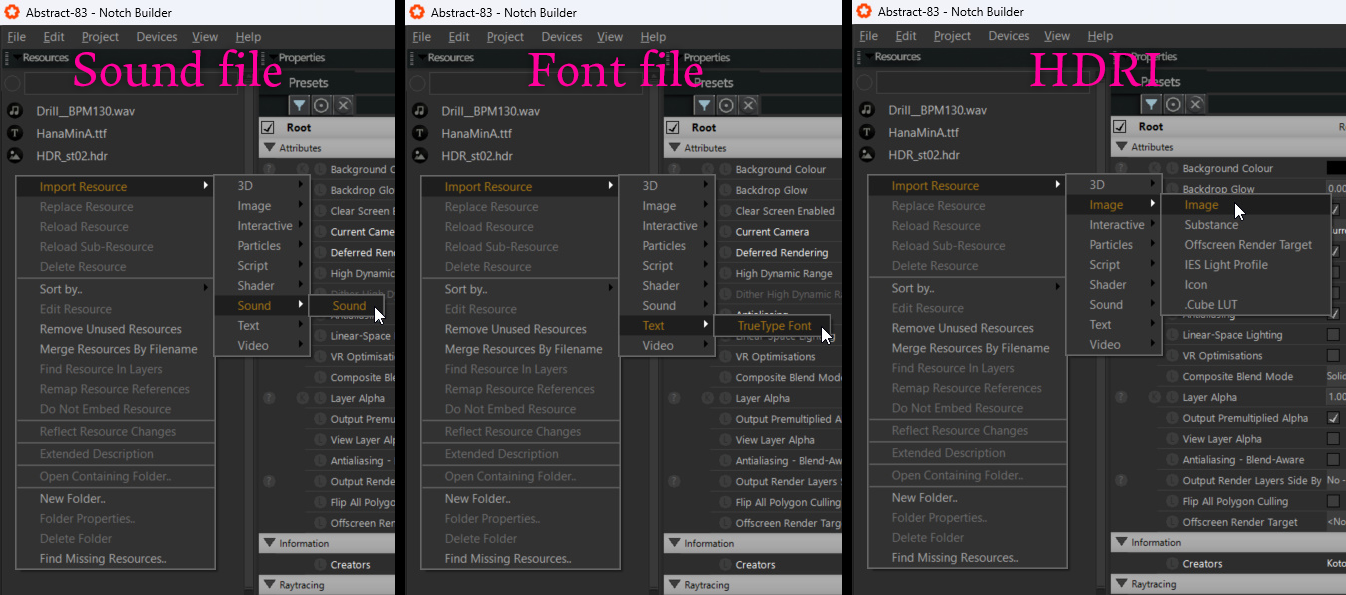
First, import the sound file, font file, and HDRI into the Resource Browser.
(Right-click on the Resource Browser)
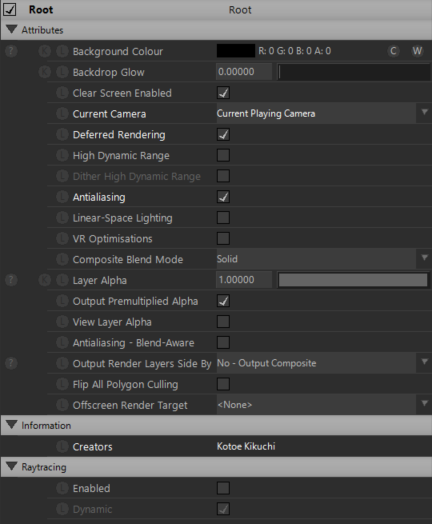
Set the Root. Check Deferred Rendering and Antialiasing.
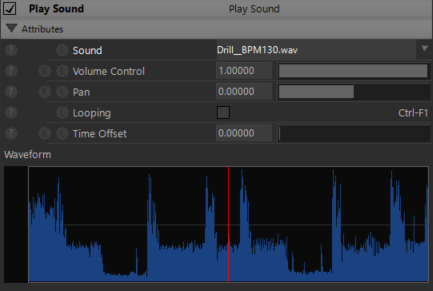
Drag and drop a sound file from the Resources Browser into the Nodegraph and connect it to the Root.
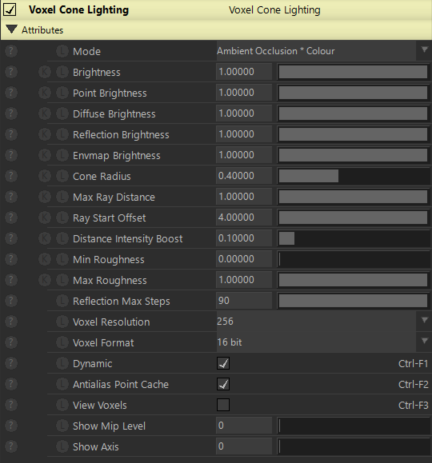
Connect Voxel Cone Lighting to the Root.
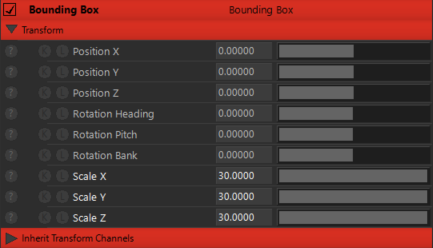
Input the Output of the Bounding Box into the Bounding Box of the Voxel Cone Lighting.
Set Scale XYZ to 30.
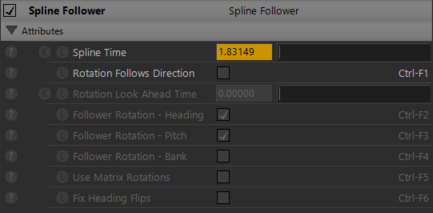
Connect Spline Follower to the Root.

Connect Spline to the Root and connect the output of Spline to the Spline Node of the Spline Follower.
Set Spline Time Mode to Length. Check Normalise Spline Time, Looping, Auto-Generate Tangents. Set Smoothness to 5.
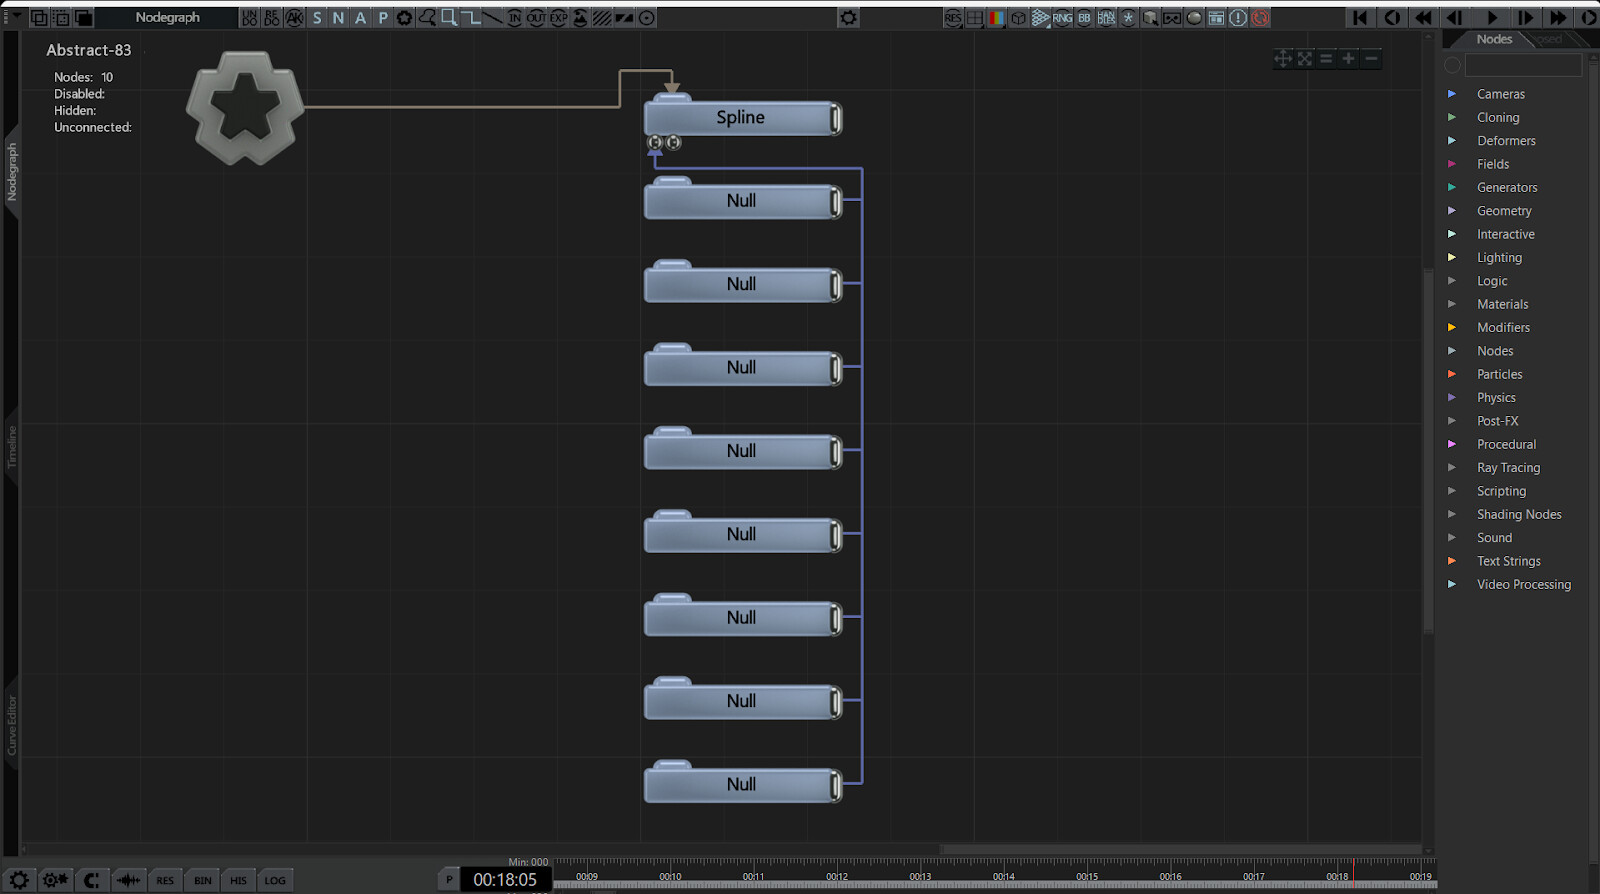
Input Null’s Output to Spline’s Spline Nodes.
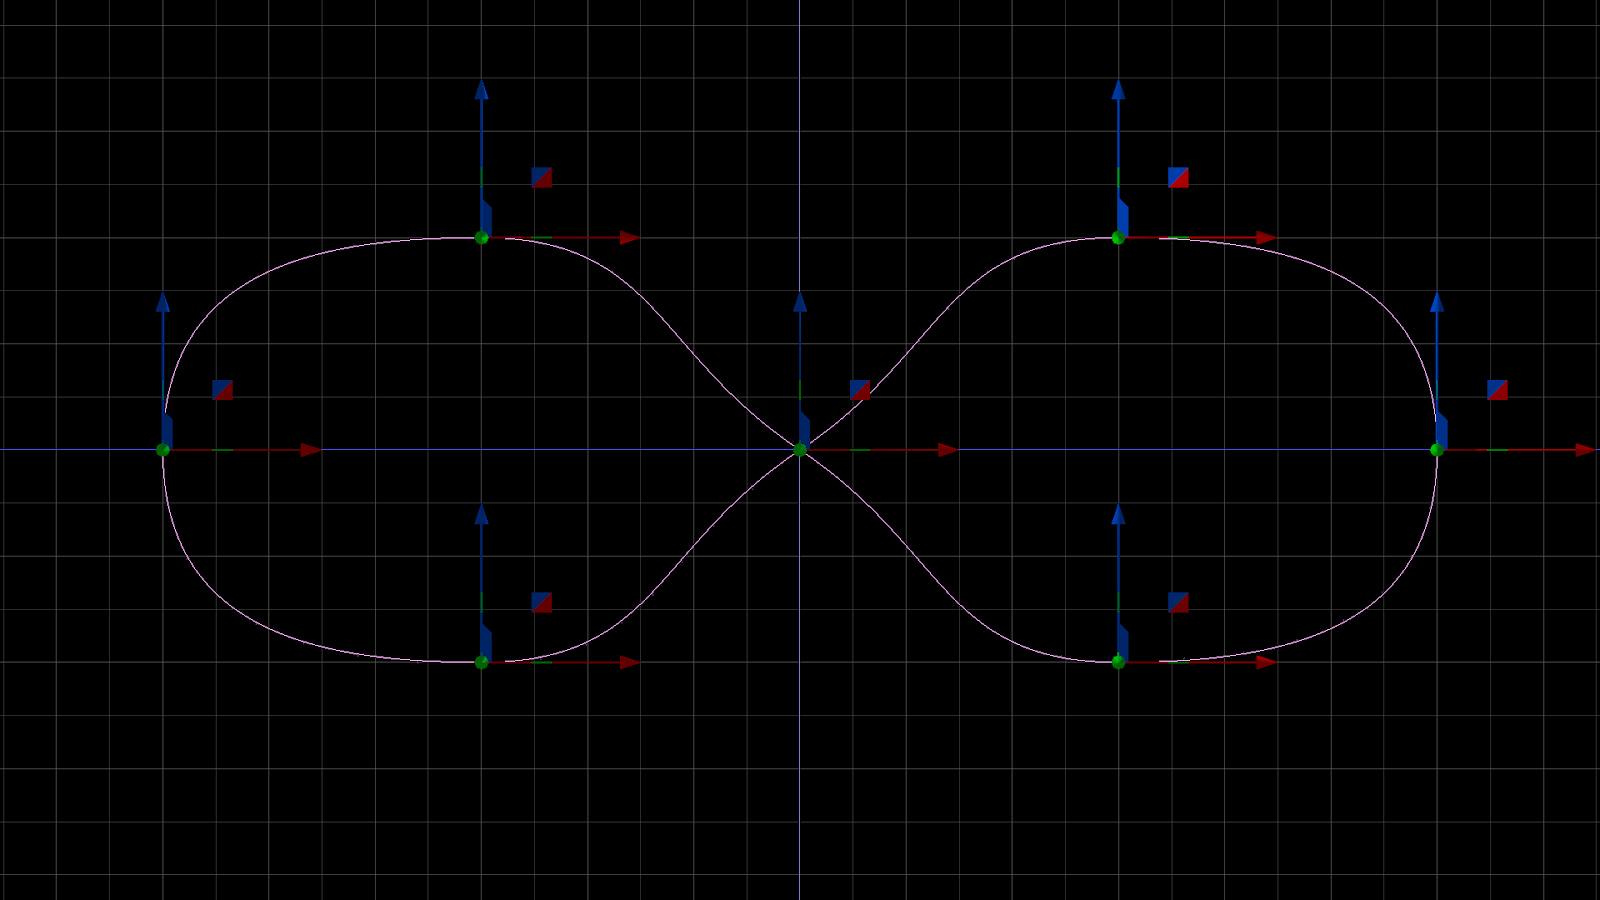
Create a trajectory in the shape of a loop using 8 Nulls.
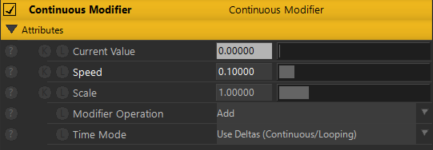
Input the output of the Continuous Modifier to the Spline Time of the Spline Follower.
Set Speed to 0.1.
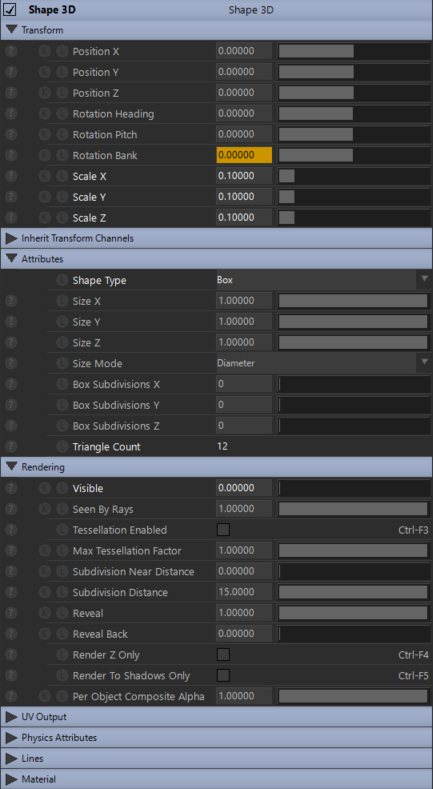
Connect a Shape 3D from the Output of the Spline Follower.
Set Scale XYZ to 0.1, Shape Type to Box, and Visible to 0.
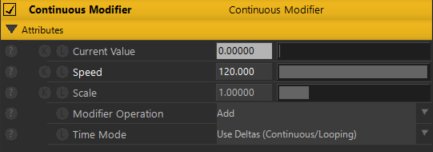
Input the output of the new Continuous Modifier into Shape 3D’s Rotation Bank.
Set Speed to 120.
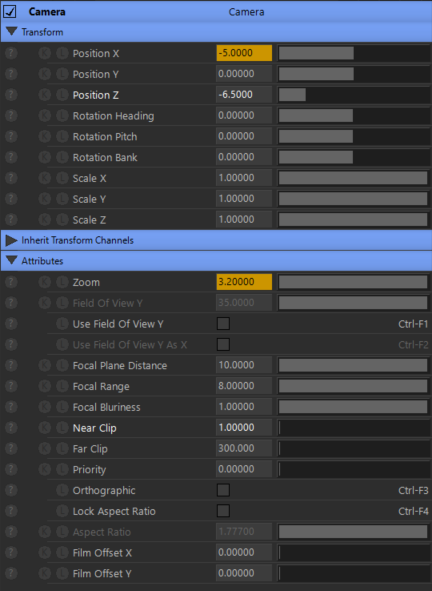
Connect the Camera from the output of Spline Follower.
Set Position Z to -6.5, Near Clip to 1, and press 0 on the keyboard to switch to Camera view.
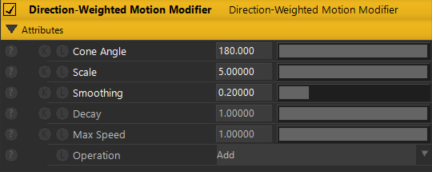
Connect the Direction-Weighted Motion Modifier to the Root.
Input the output of the Shape 3D to the Tracked Node of the Direction-Weighted Motion Modifier and input the output of the Direction-Weighted Motion Modifier to the Zoom of the Camera.
Set Cone Angle to 180, Scale to 5, and Smoothing to 0.2.

Input the output of the Direction-Weighted Motion Modifier into the Value of the Range Remap and the output of the Range Remap into the Position X of the Camera.
Set In Upper to 5, Out Lower to -5, and Out Upper to 5.

Connect a Particle Root to the Root.
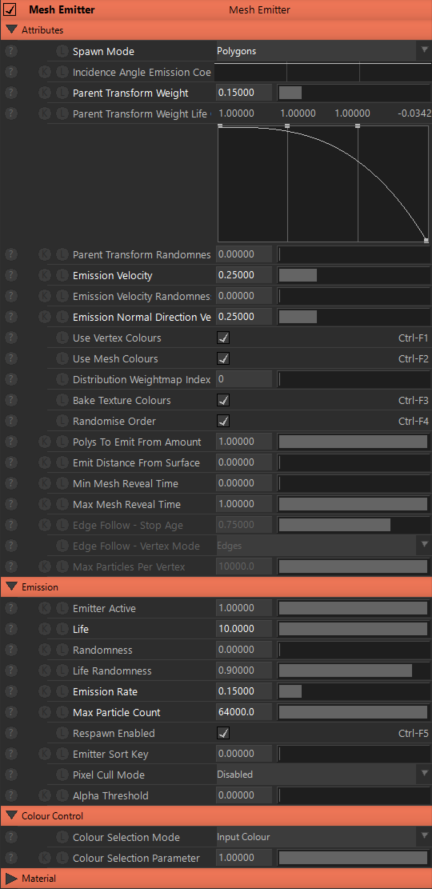
Connect the Mesh Emitter from the Particle Root output and input the Shape 3D output to the Object Nodes of the Mesh Emitter.
Set Spawn Mode to Polygons, Parent Transform Weight to 0.15, adjust the Parent Transform Weight Life Coeffs curve. Set Emission Velocity to 0.25, Emission Normal Direction Velocity to 0.25, Life to 10, Emission Rate to 0.15, and Max Particle Count to 64000.
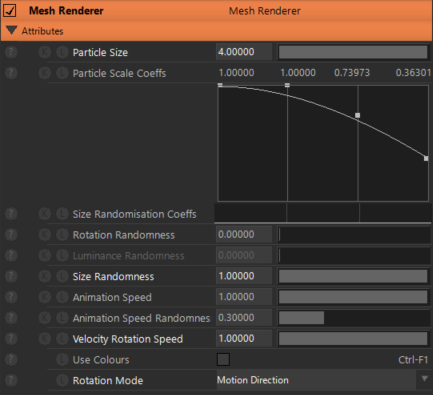
Connect Mesh Renderer from Particle Root output.
Set Particle Size to 4, Particle Scale Coeffs curve to Adjust, Size Randomness to 1, Velocity Rotation Speed to 1, and Rotation Mode to Motion Direction.
Drag and drop a font file from the Resources Browser to the Nodegraph.
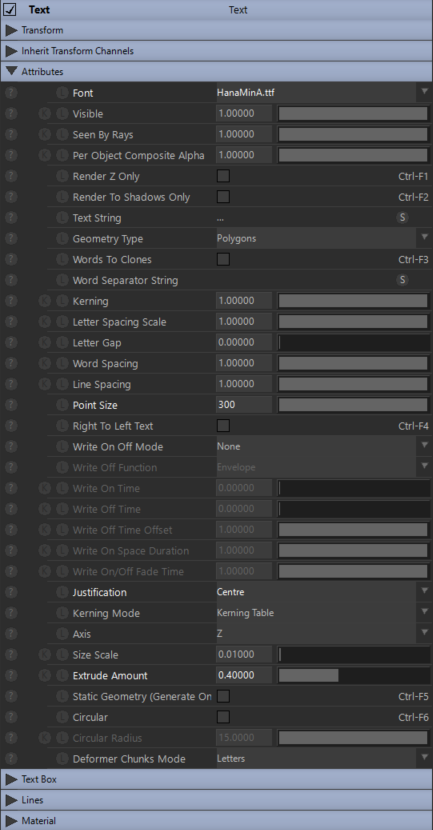
Connect the Text from the output of the Mesh Renderer.
Set Point Size to 300, Justification to Centre, and Extrude Amount to 0.4.

Input the output of a Text String into the Text String Nodes of the Text.
Click on the Text String. Type in the characters.
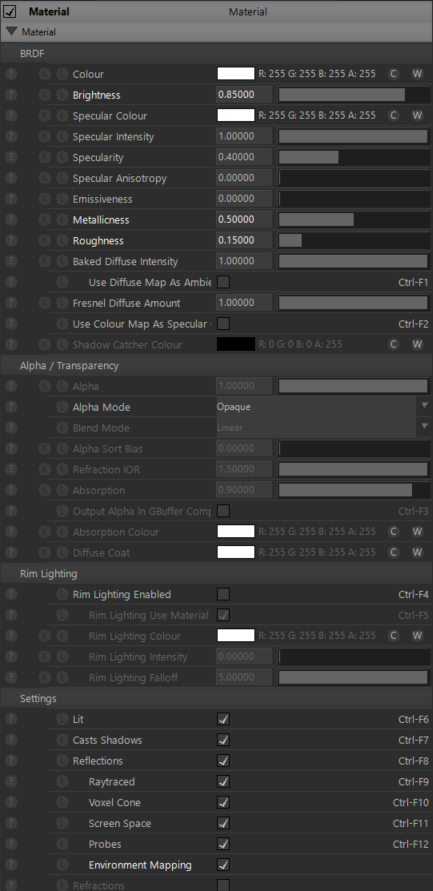
Enter the output of the Material into the Text’s Material.
Set Brightness to 0.85, Metallicness to 0.5, Roughness to 0.15, and check Environment Mapping.
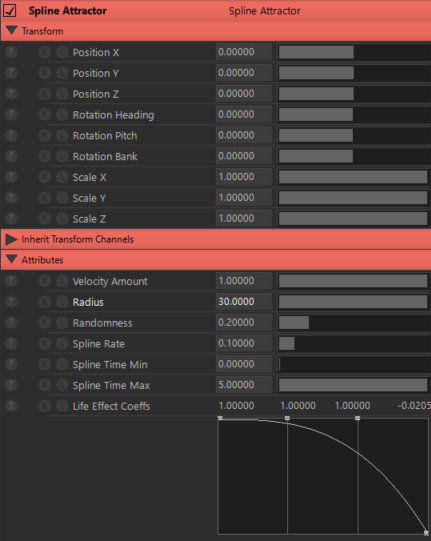
Connect the Spline Attractor from the output of the Particle Root and input the output of the Spline to the Spline Node of the Spline Attractor.
Set Radius to 30. Adjust the Life Effect Coeffs curve.
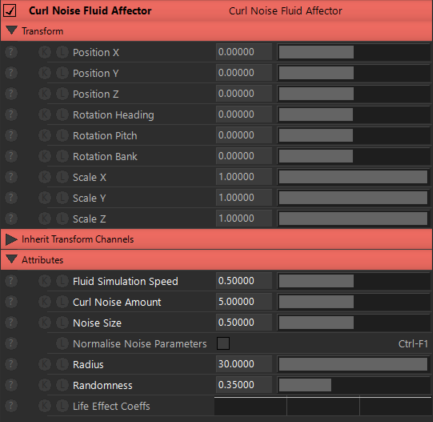
Connect the Curl Noise Fluid Affector from the Output of the Particle Root.
Set Fluid Simulation Speed to 0.5, Curl Noise Amount to 5, Noise Size to 0.5, Radius to 30, and Randomness to 0.35.
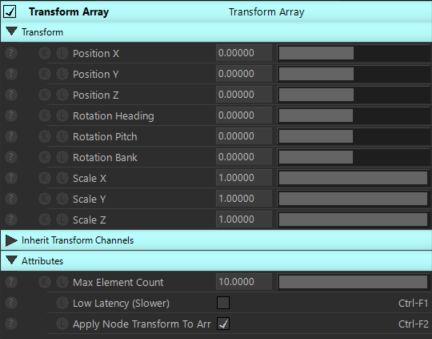
Connect a Transform Array from the Output of the Particle Root and input the Shape 3D output to the Point Sources of the Transform Array.

Connect the Turbulence Affector from the output of the Transform Array.
Set Radius to 3.5, Randomness to 0.35, Noise Scale to 2, and adjust the Life Effect Coeffs curve.
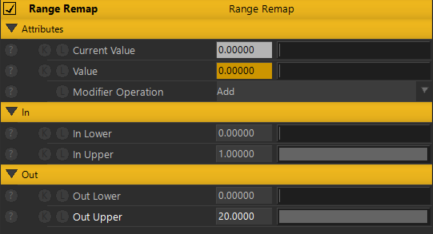
Input the output of the new Range Remap to the Velocity Amount of the Turbulence Affector.
Set Out Upper to 20.
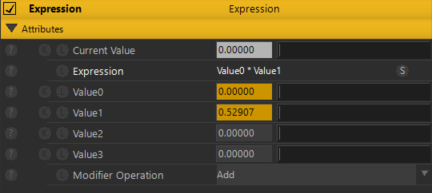
Input the output of the Expression into the Value of the Range Remap.
Type Value0 * Value1 in Expression.
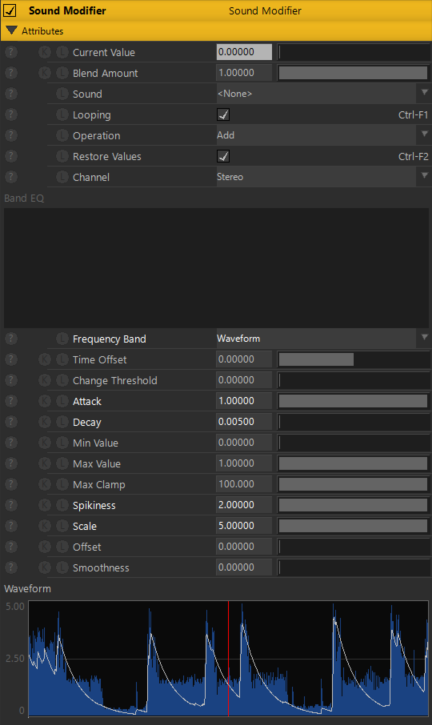
Input the output of the Sound Modifier to Value0 of the Expression.
Set Frequency Band to Waveform, Attack to 1, Decay to 0.005, Spikiness to 2, and Scale to 5.
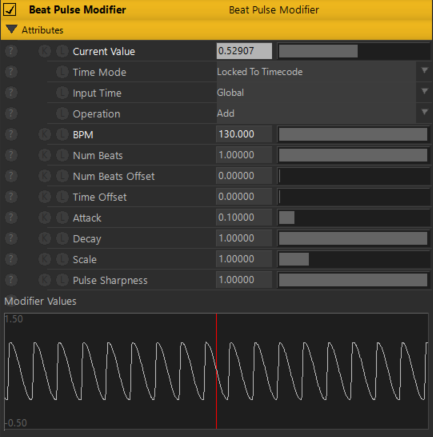
Input the output of the Beat Pulse Modifier to Value1 of the Expression.
Set the BPM to match the sound file.
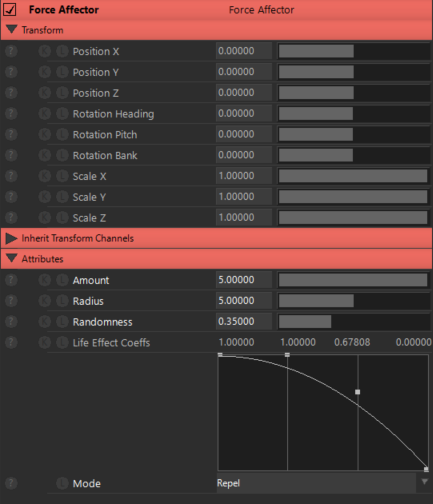
Connect the Force Affector from the Output of the Transform Array.
Set Amount to 5, Radius to 5, Randomness to 0.35, and adjust the Life Effect Coeffs curve.
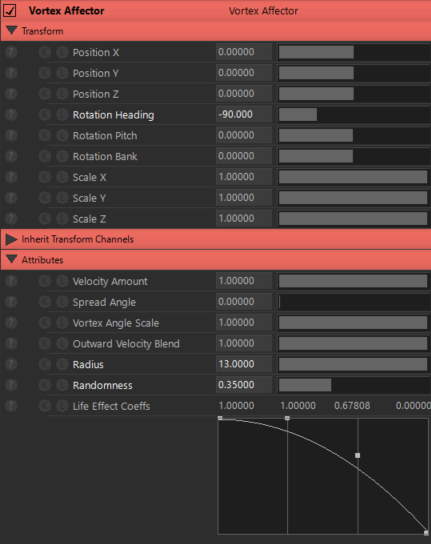
Connect the Vortex Affector from the Output of the Transform Array.
Set Rotation Heading to -90, Radius to 13, Randomness to 0.35, and adjust the Life Effect Coeffs curve.
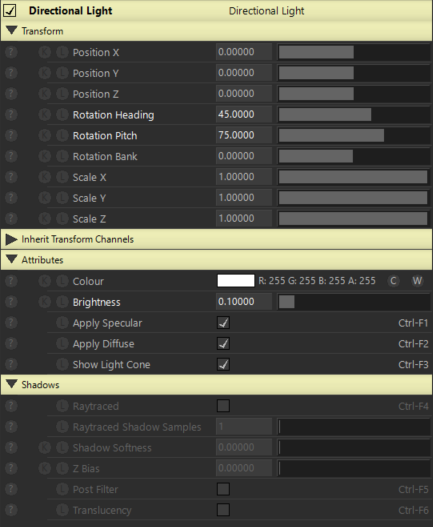
Connect the Directional Light to the Root.
Set Rotation Heading to 45, Rotation Pitch to 75, and Brightness to 0.1.
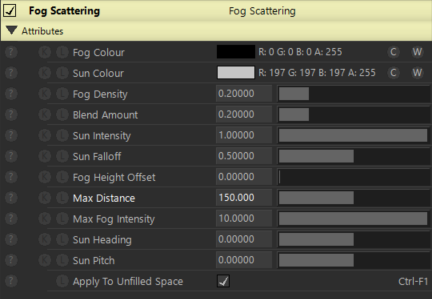
Connect Fog Scattering to Root.
Select Fog Colour and Sun Colour and set Max Distance to 150.
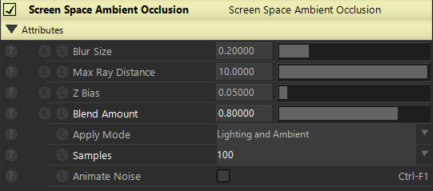
Connect Screen Space Ambient Occlusion to Root.
Set the Blend Amount to 0.8 and Samples to 100.
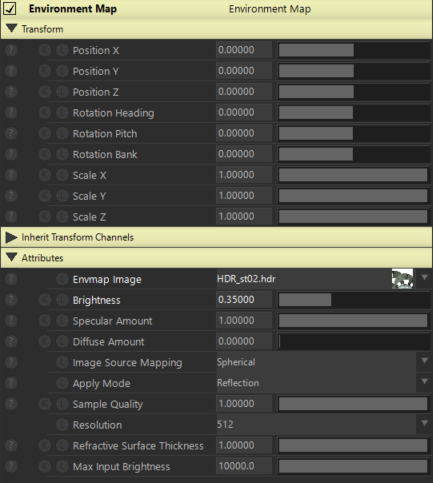
Connect Environment Map to Root.
Specify HDRI for the Envmap Image and set Brightness to 0.35.
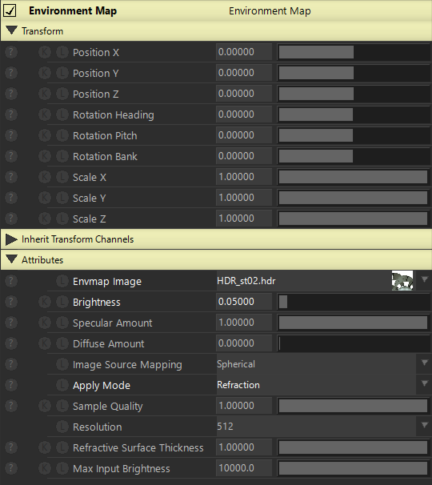
Connect the new Environment Map to the Root.
Specify HDRI for the Envmap Image, set Brightness to 0.05, and apply Mode to Refraction.
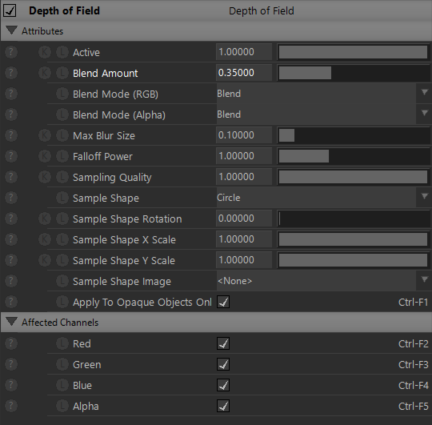
Connect Depth of Field from the Camera’s output.
Set Blend Amount to 0.35.
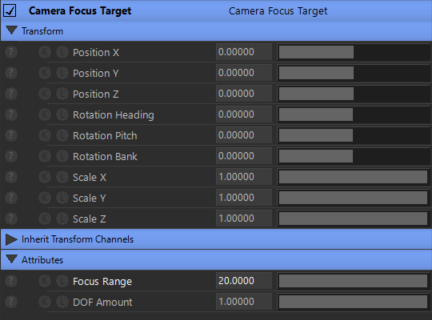
Connect Camera Focus Target from the Camera’s output.
Set the Focus Range to 20.
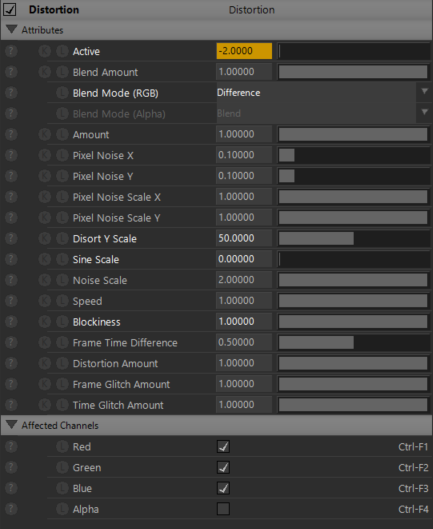
Connect Distortion from the Camera’s output.
Set Active to 0, Blend Mode(RGB) to Difference, Disort Y Scale to 50, Sine Scale to 0, and Blockiness to 1.

Enter the output of the new Range Remap into Active of Distortion and the output of the Expression into the Value of the Range Remap.
Set In Upper to 2, Out Lower to -2, and Out Upper to 2.
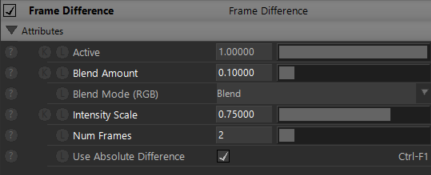
Connect Frame Difference from the Camera’s output.
Set Blend Amount to 0.1, Intensity Scale to 0.75, and Num Frames to 2.
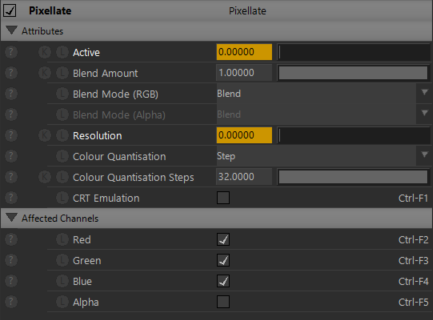
Connect Pixellate from Camera’s output.
Set Active to 0 and Resolution to 0.

Enter the output of the new Range Remap into the Resolution of Pixellate and the output of the Expression into the Value of the Range Remap.
Set Out Upper to 128.
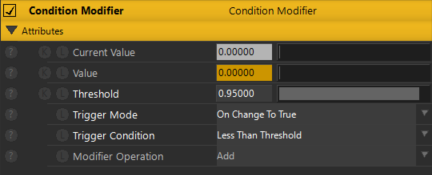
Enter the output of the Condition Modifier into Pixellate’s Active and the output of the Expression into the Condition Modifier’s Value.
Set Threshold to 0.95, Trigger Mode to On Change To True, and Trigger Condition to Less Than Threshold.
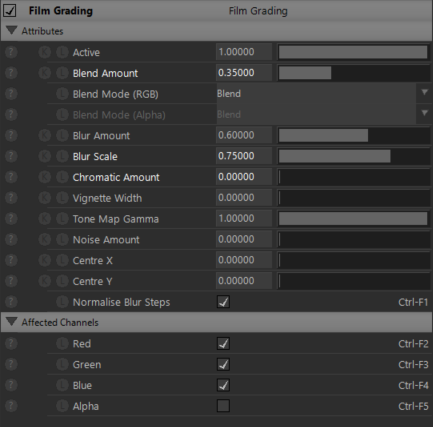
Connect Film Grading from the Camera’s output.
Set the Blend Amount to 0.35, Blur Scale to 0.75, and Chromatic Amount to 0.
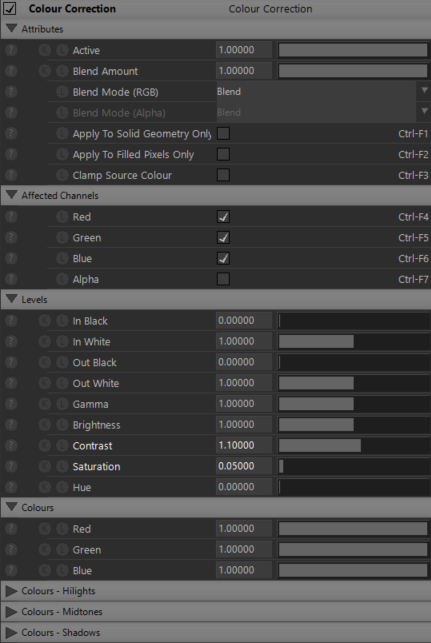
Connect Colour Correction from the Camera’s output.
Set Contrast to 1.1 and Saturation to 0.05.
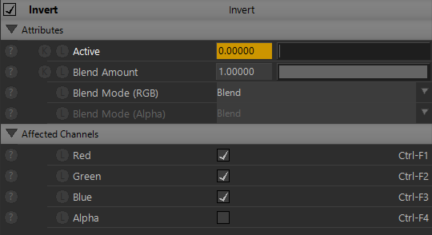
Connect Invert from the Camera’s output and input the output of the Condition Modifier to the Invert’s Active.
Set Active to 0.
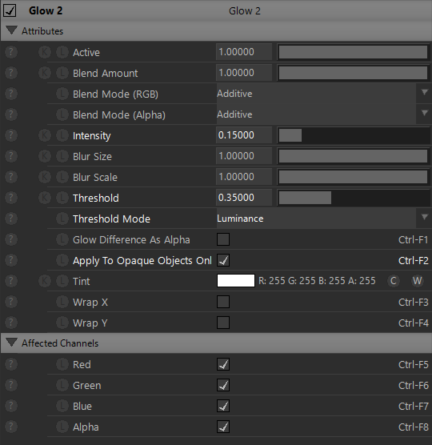
Connect Glow 2 from the Camera’s output.
Set Intensity to 0.15, Threshold to 0.35, Threshold Mode to Luminance, and check Apply To Opaque Objects Only.

Connect Sharpen from Camera’s output.
Set the Amount to 0.4 and Radius to 0.4.
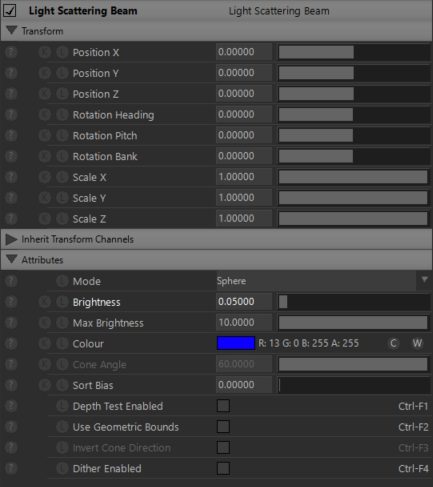
Connect a Light Scattering Beam from the output of the Transform Array.
Set Brightness to 0.05 and specify a Colour.
Your work is complete.
A special thanks to Kotoe Kikuchi for taking the time to sit down and talk to us about her journey as an artist. You can follow her on Twitter, YouTube, Vimeo, Patreon, and Note.